
Student Orientation
Zoom Tutorial
Table of Contents
- Welcome to Zoom
- Getting Started: Zoom User Guide
- Logging into Zoom
- Download the Zoom App
- Joining a Meeting
- All Students: Recording Videos with Zoom
- MSW Students: Recording Videos with Zoom
- Live Session Best Practices
- Getting Your Zoom Meeting URL (Using Free Version)
- Starting a Zoom Live Session
Welcome to Zoom
This guide will help you use the Zoom software tool for your online synchronous sessions. This software is easy to use, intuitive, and presents the user and instructor an opportunity to create a dynamic learning environment. The Zoom company also has a rich set of training materials and resources for both students and instructors.
Training materials at the Zoom Help Center.
Before you begin using Zoom, there are some basic resources that you should download or view. These are documents and locations of materials that should always have at your fingertips:
Getting Started: Zoom User Guide
- Read Getting Started on Windows and Mac.
- Watch Recorded Training Sessions
- Join Weekly Zoom Meetings and Live Training Webinars
- Join a test Meeting
Logging into Regis Zoom
It's always best to first log into your Regis Moodle LMS at https://myonline.regiscollege.edu/. Since your Moodle credentials are connected to your Regis Zoom credentials, logging into Zoom is easy. From there you can access your weekly meetings with your instructor via the Integrated Zoom App from within your course content.
Accessing Your Private Zoom Account
If you want to create your own meetings or record your own videos, it's important to ensure you are using the correct Zoom account. If you have an existing private Zoom account or another insitutional Zoom account, you should first log out or make sure the proper Zoom domain is being used. Go to Zoom and click Sign In at the top-right corner of your screen. Scroll down and use the Single Sign On (SSO) to enter the domain of regiscollege. This will ensure you are using the correct Zoom account.
You can also access a customized Regis Zoom landing page. Go to https://regiscollege.zoom.us/ and click Sign In. This will give you access to your Regis Zoom Profile as well as properly log you into Regis Zoom.
Download the Zoom App
Select the download footer link on https://regiscollege.zoom.us/ or directly from the Zoom support download page.
- For iOS, visit the Apple App Store and search zoom.
- For Android, visit Google Play and search zoom.
Joining a Meeting
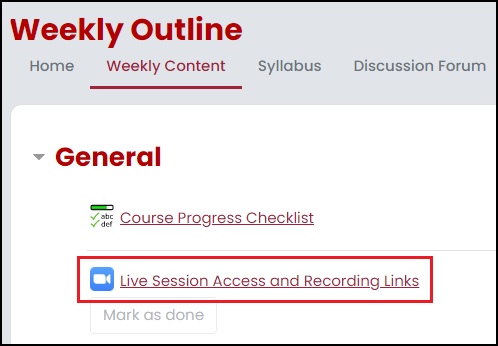
Your instructor will post meeting information via the integrated Zoom app in your Moodle course. You can find this via the Weekly Content tab under the General module.
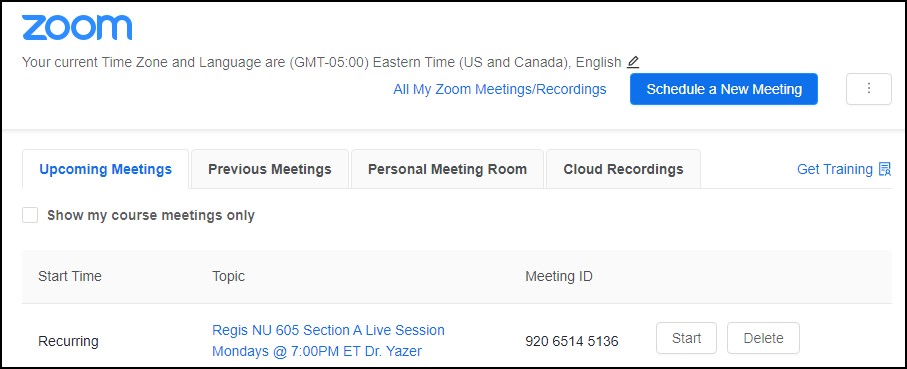
Click Start (if you've created the meeting) or Join on your instructor's posted Zoom link to launch a meeting. Follow the on-screen prompts.
Connecting Your Audio
- Testing Computer or Device Audio
- Joining a Meeting by Phone
- Audio Echo in a Meeting
- Using Telephone Call-Out
- 3rd Party Audio Conference
- Can I use a Bluetooth Headset?
Video
- My Video/Camera isn't Working
- How do I Test my Video?
- How do I Change the Video Layout?
- Camera Video is Unavailable on a Mac running 10.7
- Do I have to have a webcam to join Zoom?
All Students: Recording Videos with Zoom
The following Regis College video tutorial series will help you create your own Zoom video recordings. As long as you have a microphone, a webcam, and a quiet working environment, you should be able to create dynamic presentations and personal videos in minutes.
Please note that at this time, only students in the MSW program have Zoom Pro accounts.
Creating Zoom Videos 1—Setup (8:23 minutes)
Creating Zoom Videos 1—Setup Video Transcript
Creating Zoom Videos 2—Making a Recording (5:12 minutes)
Creating Zoom Videos 2—Making a Recording Video Transcript
Creating Zoom Videos 3—Accessing Your Recording (2:36 minutes)
Creating Zoom Videos 3—Accessing Your Recording Video Transcript
MSW Students: Recording Videos with Zoom
Creating Zoom Videos 4—Recording Settings (3:27 minutes)
Creating Zoom Videos 4—Recording Settings Video Transcript
Creating Zoom Videos 5—Making and Accessing a Recording (3:02 minutes)
Creating Zoom Videos 5—Making and Accessing a Recording Video Transcript
Regis: Joining Zoom and Accessing Recordings for Students (0:55 minutes)
Regis: Joining Zoom and Accessing Recordings for Students Video Transcript
Live Session Best Practices
Listed below are some ways to help improve your live synchronous sessions with your instructor and peers and to help you engage in a professional and positive learning environment:
Hardware
Purchase a USB headset microphone. These are relatively inexpensive at your local Best Buy or electronics store. They work better than a standard microphone and speaker because the microphone and speakers are isolated from each other. Plus, they give you a hands-free experience. A very popular one is shown below:

Connect all your equipment and test it in advance. As soon as you enter your live session, be sure to test your audio and video capabilities. If you choose to connect your hardware after you launch your live session software, the program may not detect it.
Webcams: Best Practices
Light: Make sure there’s lots of light in front and above  you and as little as possible behind you. A lot of light behind you (window, lamp, etc.) will darken your image and make you look like you are in a witness protection program.
Color: Avoid fluorescent colors, checkers, and stripes. These can confuse webcams and make odd shapes on screen.
Be Mindful of Your Surroundings: Everything can be seen behind you—even things you never thought people could see! Alert people who might be in the area that you need privacy.
Audio: Best Practices
Headsets are key: Headsets cancel out background noise and ensure easier connectivity. They also allow for better quality sound.
Why Am I Getting an Echo? This is due to you or someone in your session having their speakers on while their microphone is on at the same time. To fix this problem, the instructor may choose to mute the speakers for the whole group.
Read Audio Echo in a Meeting.
Preparation
Review your Course Announcements and Live Session discussion areas. Upcoming live session information, session focus and/or agendas will be posted to help students prepare for what will be discussed.
Accessing Your Personal Zoom Meeting URL (Using Free or Licensed Version)
While all MSW students have access to a licensed version of Zoom, all other Regis students can still take advantage of a free account. As a student, you can host a meeting by using the free version of Zoom, which allows up to 45 minutes. The first thing you’ll need to do before you run a Zoom meeting is obtain your own Zoom meeting URL and to distribute it to your attendees.
Log in to your Zoom main profile page by creating a personal Zoom account at https://zoom.us/:
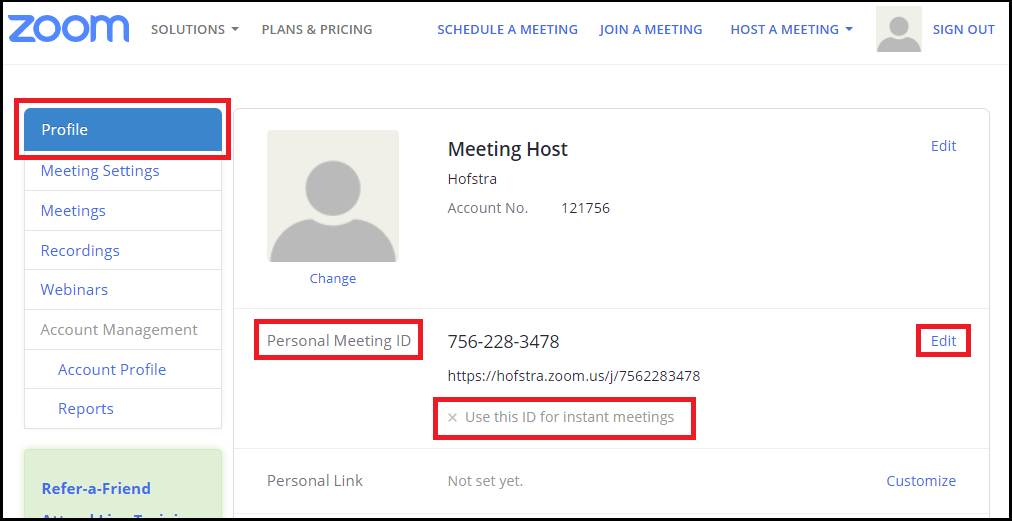
- Select the Profile tab on the left-side panel.
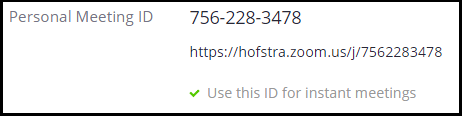
- Look for the Personal Meeting ID heading. This URL will serve as your live session meeting URL for as long as you wish. While you can still make separate meeting URLs for scheduled Zoom sessions, this Personal Meeting URL should fulfill all your needs.
- Before you can use this Personal Meeting ID with your attendees, you first have to enable it for instant meetings. Select Edit on the right-hand side and select Use Personal Meeting ID for instant meetings.
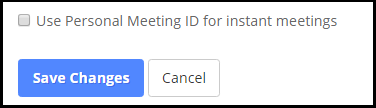
The Personal Meeting ID URL is now ready to be distributed to attendees. You’ll notice that a green arrow now appears next to the phrase Use this ID for instant meetings.
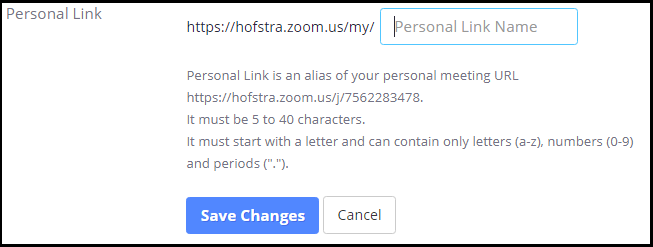
Some users prefer to make a personalized meeting link, especially if they want others to recognize that the meeting URL is for a specific purpose. Select Customize to the right of the Personal Link heading and choose a URL that you prefer. This link can also be used for any meeting.

Starting a Zoom Live Session (Use for Student Collaboration with Free Version)
The best way to start a Zoom session is simply through your Personal Meeting Room URL. At any time, copy and paste the URL into your browser and it will launch from your downloaded Zoom app. Be sure, however, that you have already logged into your Zoom account via your institution’s Zoom web address. This will ensure you login as a Host instead of as a standard attendee.
The instructions below are general and are mostly from the perspective of a scheduled meeting, rather than a Personal Meeting Room URL:
- How do I host a Video Meeting?
- How do I Invite Others to Join a Meeting?
- How do I join a Meeting?
- How do I Start or Join a Scheduled Meeting as the Host?
Screen Sharing
- How do I Share my Screen?
- Sharing a Whiteboard
- Black Screen During Screen Sharing
- Sharing Computer Sound During Screen Sharing
- Screen Share a Camera Input
- How do I Start a Screen Share Meeting?
- Optimizing a Shared Video Clip in Full Screen
- Using Annotation tools on a shared screen or Whiteboard
- Screen Sharing a PowerPoint Presentation
- Screen Share a Keynote Presentation
- Full-screen when screen-sharing?
- Switching Windows During Screen Sharing
- Request or Give Remote Control