Regis MyOnline Moodle Training

Welcome
Hi Faculty! This guide is intended to support the live training that I offer every semester. I know many people can’t attend and many more who would like some more resources. This resource is intended to enhance the live training and not replace it—please be sure to view a full recorded session and reach out to me if you have any further training questions.
Thomas.yazer@boundlesslearning.com
Homepage Navigation
Click each of the green icons  to reveal the content of your Moodle Homepage.
Click the Back to top button  to return to the main Homepage Navigation screen.
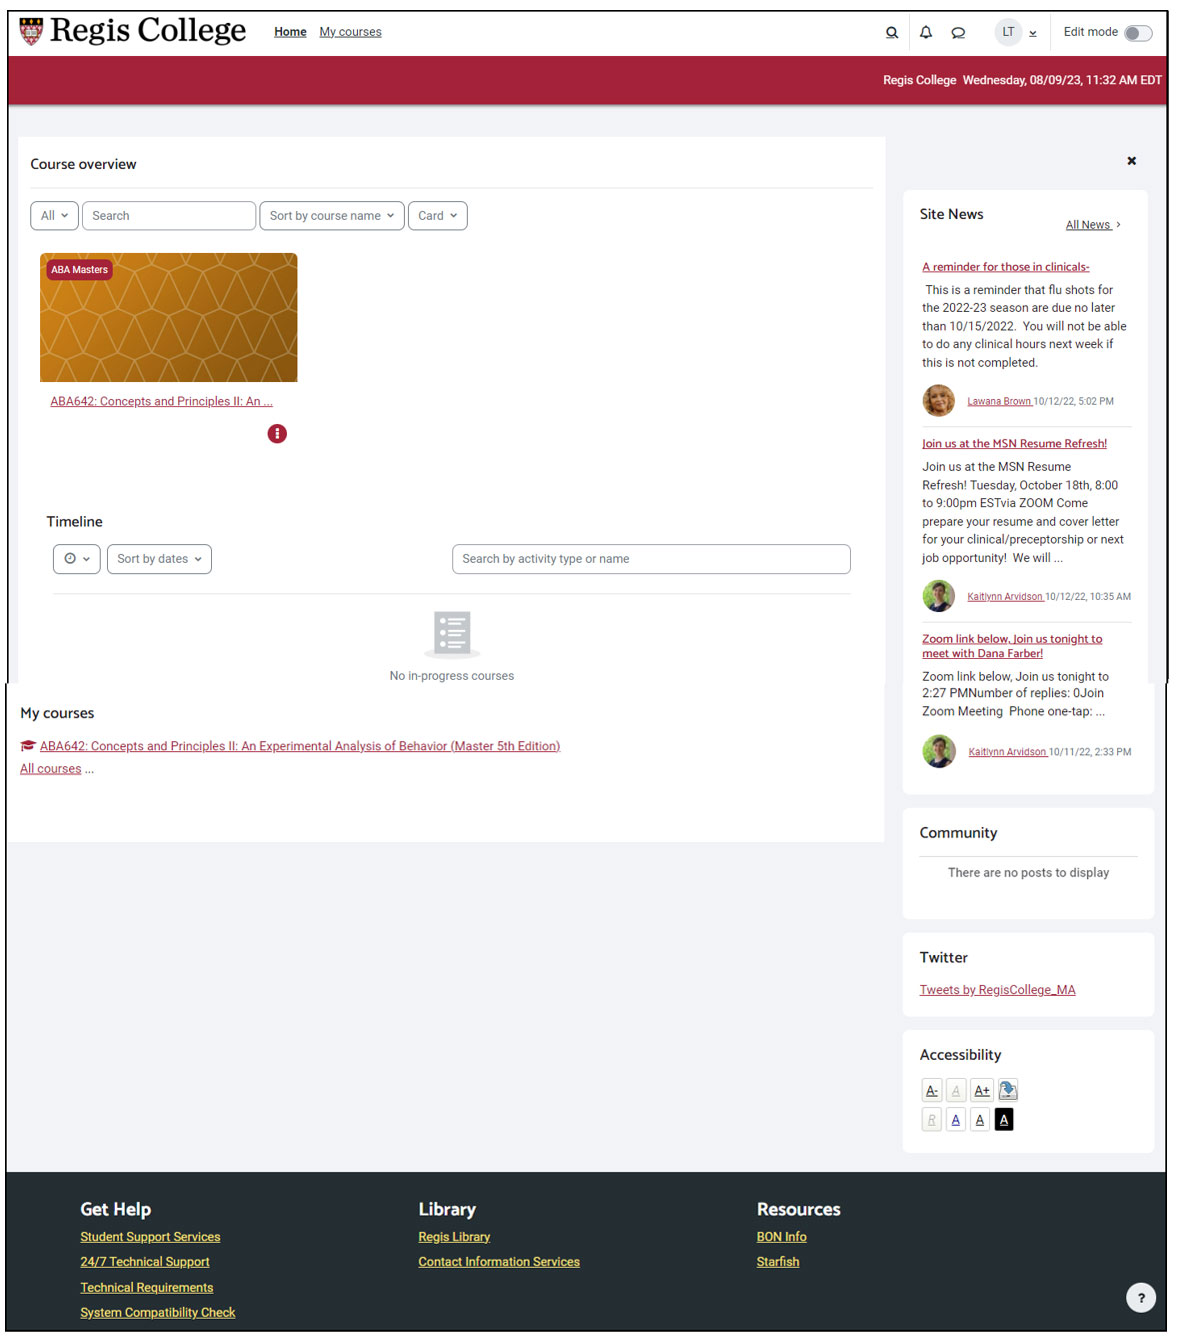
Moodle Home & My Courses (Top-Left Menu)

| Home | Returns the user to the main Moodle Homepage (Not the homepage of a course) |
|---|---|
| My Courses | A simplified view of a user’s course list, with access to Site News, Community, Regis’ X (formerly Twitter) account, and more. |
Bottom Menu

Get Help
Student Support Services
A support service to assist students during their online degree program. The representatives will monitor students and provide resources to help them be successful. If an instructor sees a student is not attending sessions, has lower grades or performance, or knows a student needs extra support, please contact Student Support Services.
24/7 Technical Support
A 24/7 service that can be accessed via a toll-free phone number (live phone chat), a live keyboard-based chat, or an online ticket system where users can identify urgent and non-urgent issues with their Moodle courses or Zoom software.
- The system is for both students and instructors.
- For urgent matters that directly affect student performance, submit a ticket and call the 24/7 live phone system. Also, instructors should email their lead course practitioner about the urgent issue.
Technical Requirements
Most modern computers should be able to access Moodle, trouble-free. For some Mac users, additional security permissions may be needed.
System Compatibility Check
A tool used to verify if a user’s computer can access all features of the Moodle LMS without issue.
Library
Regis Library
Quick access to the Regis library for both students and instructors.
Contact Information Services
Quick access to online research librarians at Regis
Resources
BON info
A set of important links and information for Regis nursing students.
Starfish
Starfish is an advising and retention management system used at Regis to help support the academic progress of students. Faculty use Starfish to track the academic progress of students via flags or kudos, schedule appointments with students, make student referrals to academic support services like Tutoring or Academic Coaching, and send messages to students.
Students use Starfish to schedule appointments with their advisor, instructors, academic coach, or a tutoring center, keep track of their own attendance, and view a list of services offered throughout campus
Profile and Settings (Top-Right)
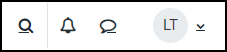
- Global Search: The magnifying glass
 icon. Useful for finding words or phrases of course content in any course that you are enrolled.
 - Notifications: The bell
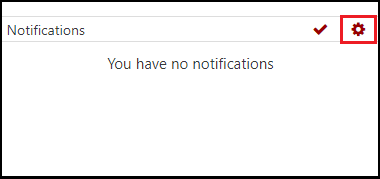
 icon. Shows all notifications of course events and communications. Users can customize what events trigger a notification to Moodle, their institutional email, or their mobile device. To do this, click the bell icon. Then, click the gear
  icon at the top-right corner of the popup.
- Moodle Messaging Drawer: This speech bubble
 icon is an on and off toggle that displays the Message drawer with all of your internal Moodle messages. The Messaging tool used in Moodle is convenient for casual communication but all course-related communication between student and instructor should be handled through institutional email.
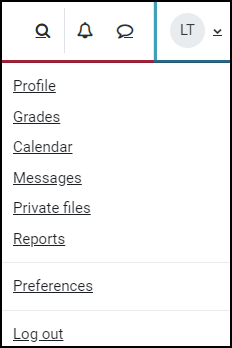
- Your Moodle Profile
- Your Personal Profile and Faculty Profile in Moodle: There are two ways to identify yourself in Moodle: A Personal Profile and Faculty Profile
Personal Profile
To Edit Your Personal Profile:
- Go to the drop-down menu found next to your initialed name in the upper-right corner of the Moodle screen and select the Profile option.

- Select the Edit profile link in the Users Details box.
-
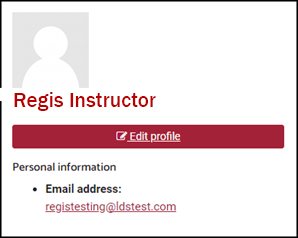
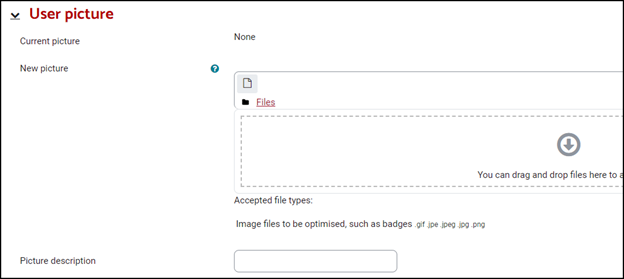
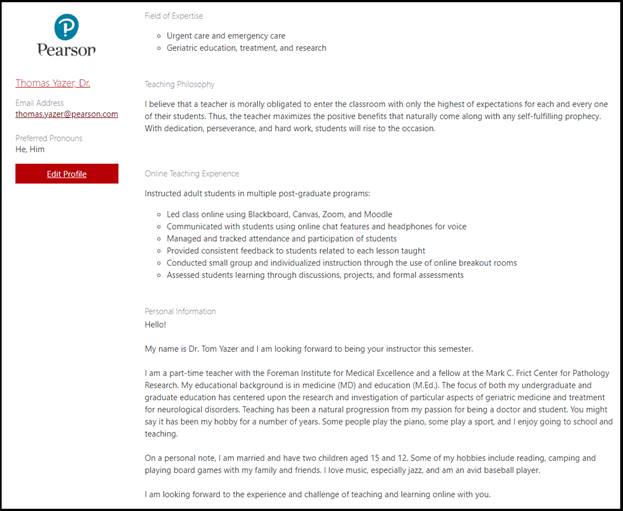
Accurately fill-in the basics of your personal information. The majority of your profile material will be filled out in the Faculty Profile. The one major area here to complete is your User picture. This image will show throughout Moodle when you post.
Faculty Profile
To Edit Your Faculty Profile:
- Go to the drop-down menu found next to your initialed name in the upper-right corner of the Moodle screen and select the Profile option.

- Select the Edit profile link in the Users Details box.

- Scroll down to the bottom of the screen until your reach the Faculty Profile tab:
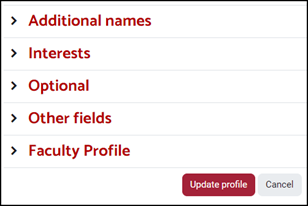
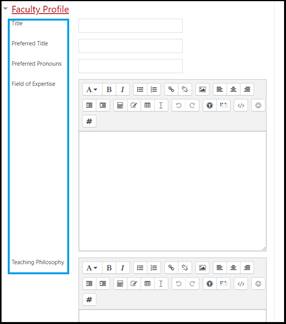
- Click Faculty Profile to reveal a set of standardized text boxes. Complete all fields as necessary and click Update profile at the bottom of the screen when finished. The fields include:
- Title
- Preferred Title
- Preferred Pronouns
- Field of Expertise
- Teaching Philosophy
- Online Teaching Experience
- Personal Information
- Return to your online Moodle course. Look for the Faculty tab in the middle of your course space.

- Click Faculty and the information entered into your Faculty Profile will automatically populate here for all members of your course. Edits can be made by clicking Edit Profile at anytime:
- Go to the drop-down menu found next to your initialed name in the upper-right corner of the Moodle screen and select the Profile option.
- Grades: Grades brings you to your own personal gradebook (only useful for students).
- Messages: The same Moodle Messaging service available on the top menu.
- Preferences:

There are many options in Preferences that you can adjust but the two areas that are most important are the following:
Forum Preferences:
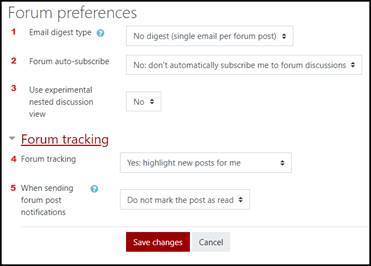
- Email digest type: Leave off to avoid excess email notifications.
- Forum auto-subscribe: Leave off to prevent Moodle from forcing all posts from students to come also to your email.
- Experimental nested view: Optional
- Forum tracking: Turn to Yes to highlight all new forum posts
- When sending forum post notifications: Leave as “Do not mark…”
Notification Preferences
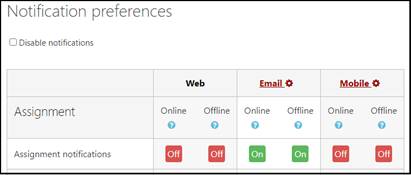
Notifications: Shows all notifications of course events and communications. Users can customize what events trigger a notification to Moodle, their institutional email, or their mobile device. To do this, click the bell. Then, click the gear
icon at the top-right corner of the popup.
- Log Out: Log out of your institution’s Moodle account.
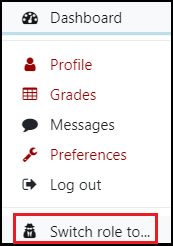
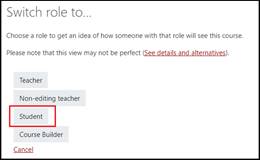
- Switch Role to: An easy way to view your course and your Moodle experience from a different user’s perspective. Many instructors like to view their course via the Student view to see what their student’s might see. A highly effective way to work out issues with content.
- Your Personal Profile and Faculty Profile in Moodle: There are two ways to identify yourself in Moodle: A Personal Profile and Faculty Profile
Course Overview
-
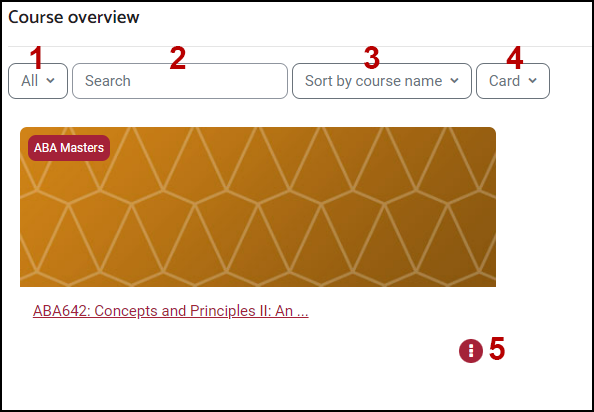
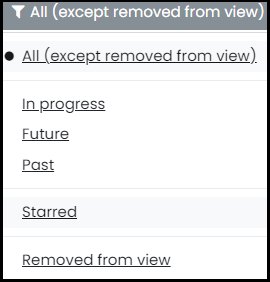
Selection
Your selection from this pull-down menu will dictate what courses are seen on your Home Page:
All: Every course you are enrolled in.
In progress: Every course that has active students
Future: Every course that has a start date in the future
Past: Every course that has an end date in the past
Starred: If you star a course, this option will only show the courses you have starred. Very useful if you have many courses to keep track of or you want to view a particular course at the top of your screen.
Removed from view: Only see courses that were removed from view
- Search
If you don’t see a course, simply search using the course title or number to bring it view.
- Sort:
Sort by course name or Sort by last accessed
- Card, List, or Summary View
- Star or Remove a course from view.
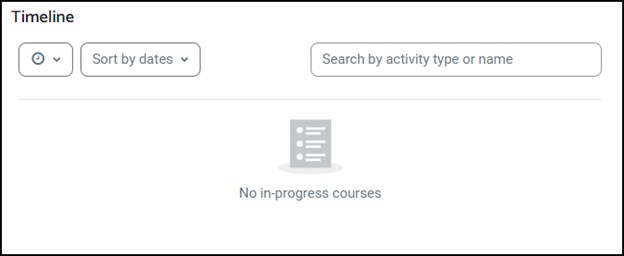
Timeline
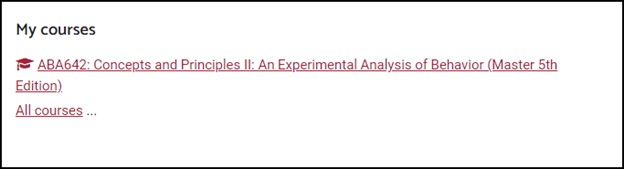
My Courses
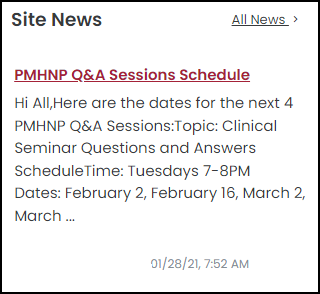
Site News
Community
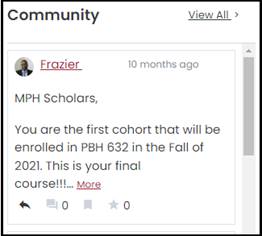
A message service that allows all users of the Moodle site to communicate with each other. Users can create messages that reach not only their cohort but all members of their online education program. Users can also create private groups that restrict membership.
If you would like more information on using the Community tool, please access this training document.
Course Homepage Navigation
For Moodle 4.1, your course view may look like one of two separate layouts: the Standard Course View or the Topic Course View. The differences are noted below:
Topic Course View
In the Topic Course View the General section of your course is part of the Course Homepage.
Profile and Settings (Top-Menu)
This menu system remains the same as seen in your Moodle Homepage. If you’d like to learn about these features, please see the .
Course Settings and Time (Secondary Menu)

This menu system is largely for students. If you would like to access your Gradebook or Reports, please see the side-panels.
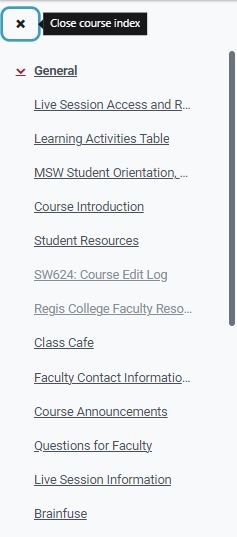
Course Index
The Course Index is a feature on the left-side of your screen that allows easy access to the content pages of your online course. Click the  button to expand or the
  button to close the Course Index.
The Course Menu
The Course Menu offers the user a way to navigate through specific categories of content. Clicking any of the headings returns the user to the first page of a category.
The Home Tab

Returns you to the course homepage.
The Course Content Tab
Course Content

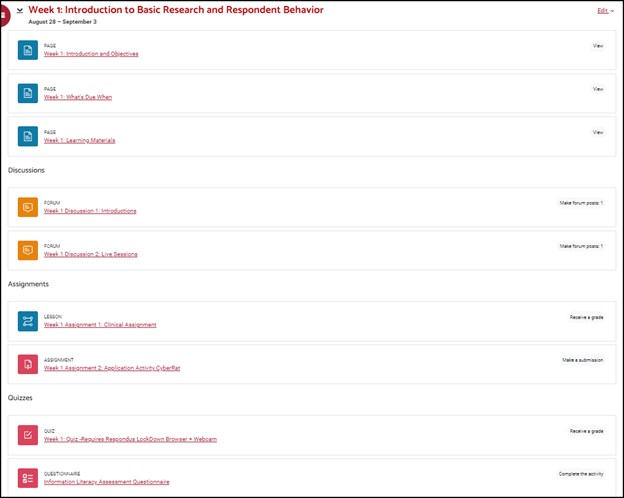
In Topic Course View, the Course Content section of your course is now composed of labeled icons. Each of these icons reveal a specific module of content. See the image below:
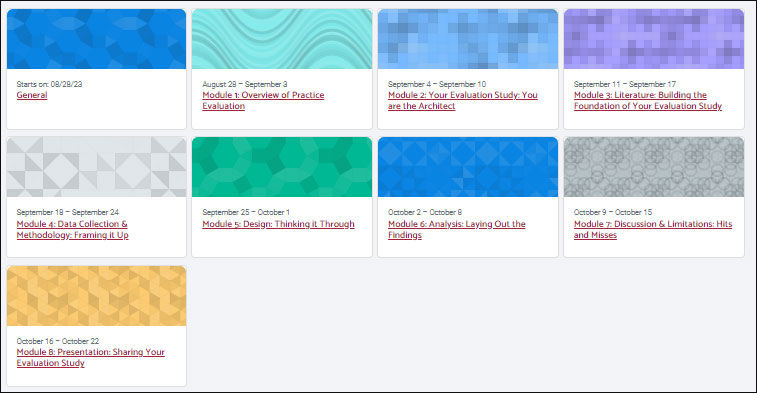
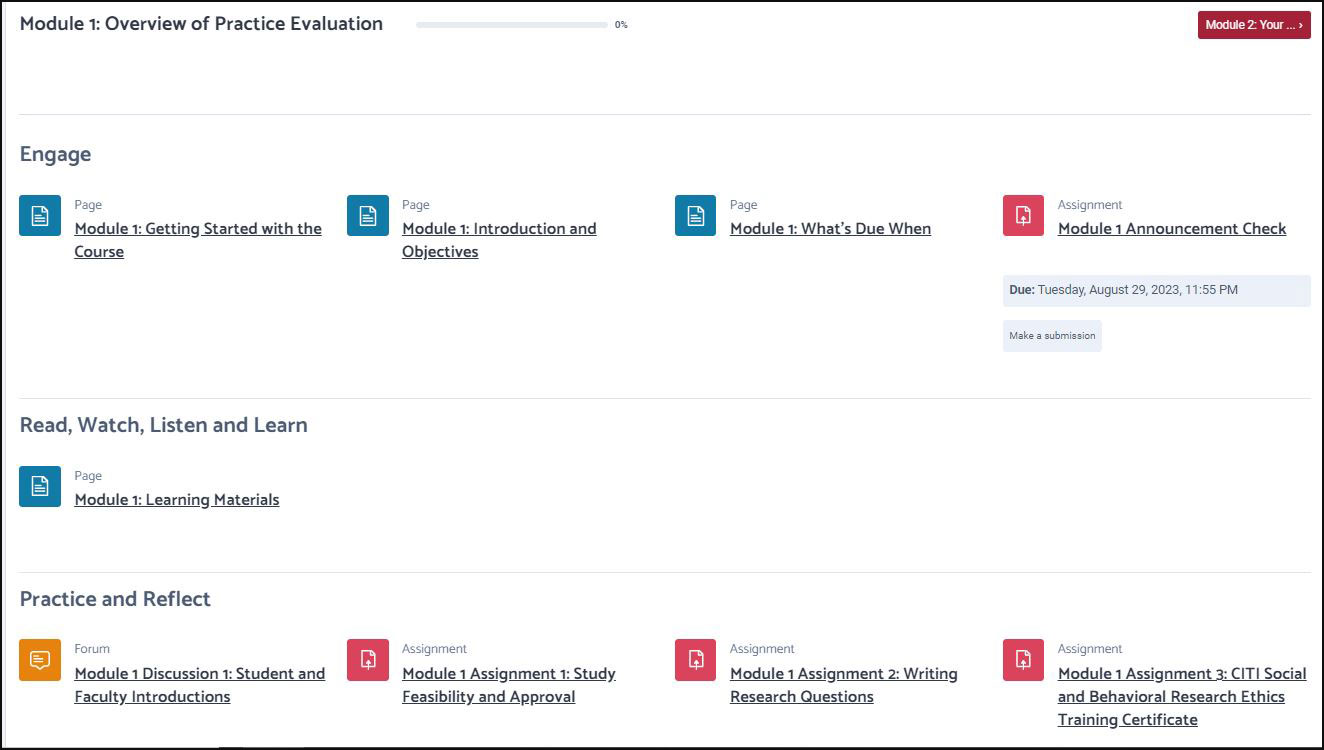
In Topic Course View each module contains content organized by the kind of material within it:
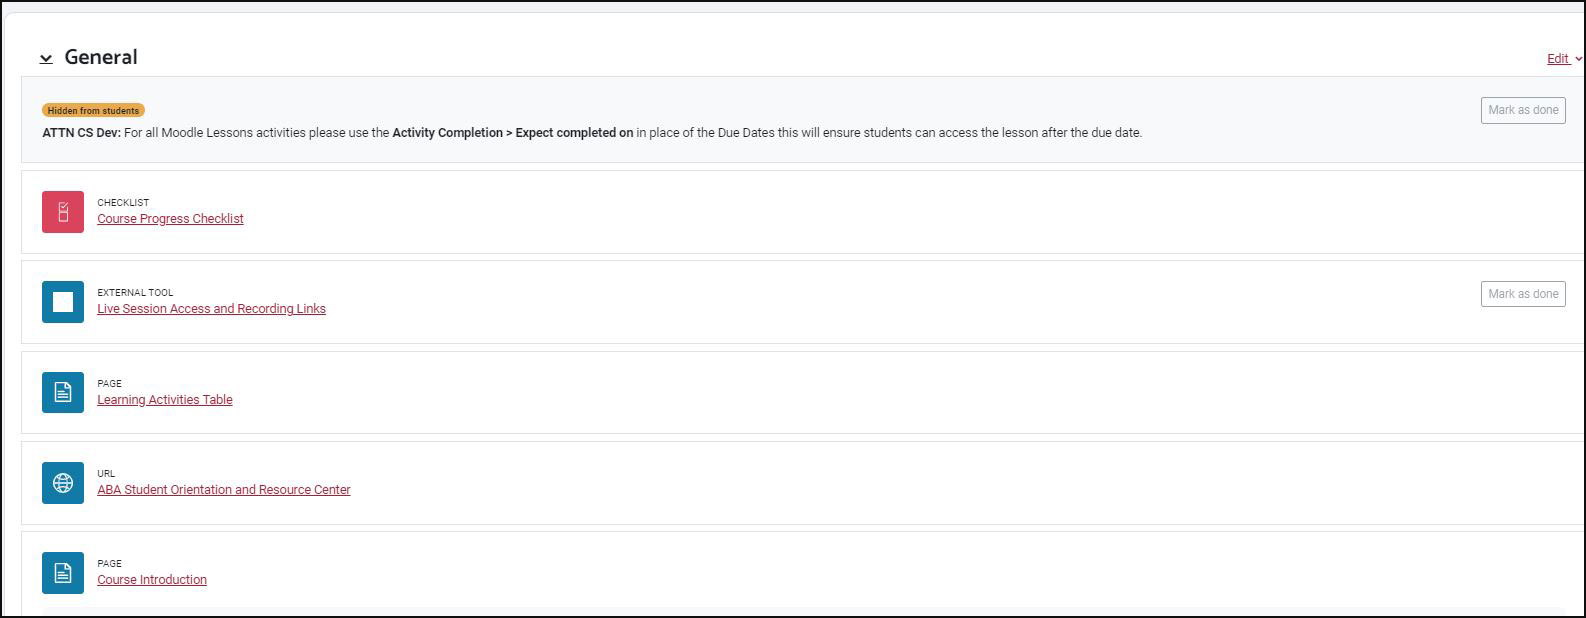
The General Section

The General section includes pages and items that students (and instructors) will need to review and access during the course. Some pages will have a “Hidden from students” label and will appear grey. This does not mean that instructors cannot access and interact with these pages.
Listed below are some of the more common elements found in General:
- Course Progress Checklist: This page identifies the pages that students have clicked and/or completed the qualifications for that activity to be labeled “complete.”
- Learning Activities Table: A page filled with a chart complete with all activities, due dates, and points for the entire course.
- Link to Faculty Orientations and Resource Center: This is a comprehensive resource area for all instructors. It contains all the information needed to teach and to get help. A great site to bookmark!
- Course Edit Log: This page is designed to allow instructors to make note of an error found in your live course. If you notice a spelling mistake, content error, broken link, or just want to make a suggestion for a change, this digital form will help make further iterations of this course even better for students.
- If you see an error that directly affects students’ performance, complete the Course Edit Log but also contact your Lead Faculty so the issue can be dealt with immediately. If you are a Lead Faculty member, please contact Tech Support, fill out a ticket, and follow up with the Lead Instructional Designer to have the issue fixed.
- Brainfuse: Certified Brainfuse tutors provide live, on-demand tutoring and assignment help in a variety of subjects, customized for your institution, when students need it most. Through intentional collaboration, Brainfuse tutors meet students where they are at in order to effectively help students of all skill levels. Brainfuse writing lab tutors use proven methods to assist users throughout the writing process, from inception to final draft. Brainfuse tutors work with students to revise critically, develop sensitivity to one’s audience, and ultimately become better writers.
Brainfuse offers an extensive collection of self-guided tools, including:
- SkillSurfer, a comprehensive library of lessons and practice tests in a variety of core subjects.
- Diagnostic tests for targeted academic support
- Flashbulb, a versatile flashcard tool with a library of content and creative features to refresh study habits.
- Foreign language lab with on-demand tutoring support and a robust vocabulary builder for students
The Syllabus Tab

The Syllabus button contains a digital and printable version of the course syllabus. This document is an important for students to read and it’s imperative that you reiterate important elements of the syllabus early and throughout the course to remind students of policies and procedures.
Listed below are some of the areas of the syllabus that you may want to repeat in your course via Instructor Announcements:
- Days of the week: Day 1 typically being Monday and Day 7 being Sunday
- Due Times: Most assignments are due at 11:55 P.M. EST
- Citations and referencing requirements
- Frequency of email correspondence
- How to use Technical Support and Student Services Support
- A reminder of the grading policy, including the course late assignment policy
- Academic Integrity, attendance, code of conduct, and any other policy that might affect student behavior or performance
- Academic support and advising for graduate students
- Library access
- Any course-specific material that could affect learning
The Discussion Forum Tab

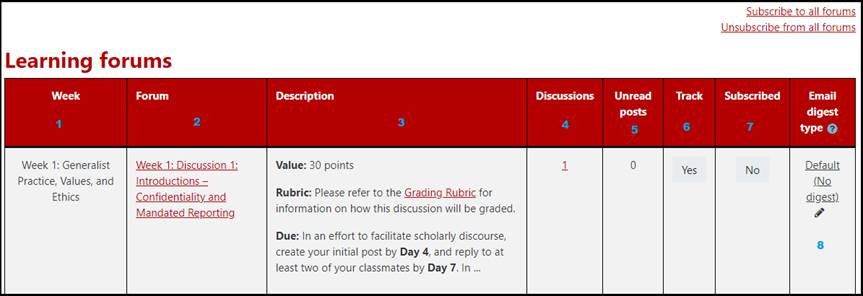
The discussion forums listed in this area are whole class and small group activities. These are the discussions that you will moderate, monitor, and contribute to in order to ensure student success.
- Week: Name of the week of your course
- Forum: A direct link to the discussion and its name
- Description: Note the value and due dates of your discussions. Discussions typically require students to post their initial post by Day 4 (Thursday) and complete responses to classmates by Day 7 (Sunday). This is done purposely to give everyone a chance to read and respond within a reasonable timeframe. Some discussions may have different requirements.
- Discussions: The number of threads in the discussion. This does not list the number of replies or posts.
- Unread Posts: The number of discussion posts that you have not seen as of yet.
- Track: Indicates if the instructor or student is using the tracking feature that allows notification of a new post.
- Subscribed: Indicates if the user has subscribed to the discussion meaning all new posts will alert the user via Moodle and email. Subscribing to all or specific forums is a decision you need to make. If you subscribe to all, it means every message posted by a student will not only post online but is also sent to you in an email alert. For a typical class that has two discussions a week and 20 students, this means on average three discussion posts a student. This will mean you’ll be receiving at least 120 emails a week of discussion posts!! We highly advise you not to subscribe to weekly discussions.
- Email Digest Type: Indicates if the user has subscribed to a digest style email of replies. This amalgamates all replies into one or many emails through the week.
The Assignments Tab

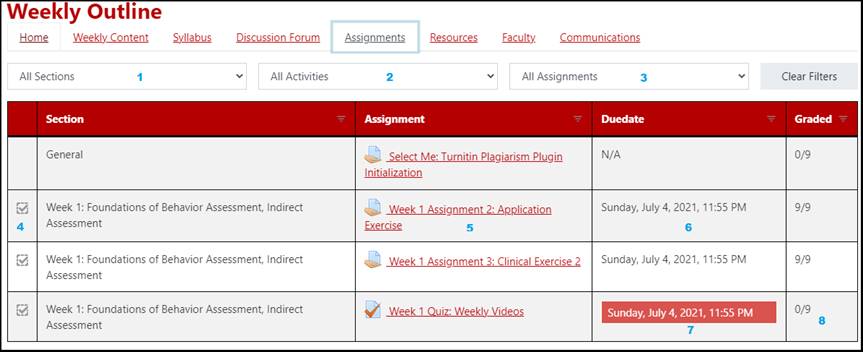
- This area allows instructors to filter only the activities of a particular week/module.
- This area allows instructors to filter only a specific type of activity to grade.
- This area allows instructors to filter only a particular status of an assignment:
- All
- Overdue
- Upcoming
- Completed
- A direct link to the activity.
- A due date of a particular activity.
- An overdue activity where an instructor has yet to complete grading.
- The number of graded and ungraded assignments.
The Resources Tab

The Faculty Tab

The Communications Tab


Course Announcements
This forum is a direct link to your whole class on Moodle. Whatever you post here also goes to each student’s institutional email. Consider the effect a very active instructor might have in this special forum and aim for a minimum of 1-3 posts per week to engage students. Also consider that students can only read these messages and are not able to post their own replies. By default, all students are automatically subscribed.
Faculty Contact Information and Office Hours
This forum is another area of Moodle where instructors can place their contact information as well as when they are available for office hours/1-on-1 sessions.
Questions for Faculty
This forum is very important for you to subscribe to. This forum is for students to ask you questions and for you to respond thoughtfully within 24hrs. Assuming that the questions here are important enough to be brought up by one student, there is a chance that all students in the class could be having the same issues. Respond to the student in this forum but make sure you reiterate the issue and response in your Course Announcements.
Live Session Information
This forum is particularly important for instructors to use for:
- Posting the URL and times for students to join scheduled Live Sessions.
- Instructors should use this forum and the Course Announcements forum to post summaries to Live Sessions and any additional resources that might be relevant to those that missed the session.
Course Reminders
This area contains important statistical and process-related information for both instructors and students.
24/7 Technical Support
A direct link to your dedicated 24/7 technical support. All students and instructors can access this service at any time.
Moodle and Zoom Help for Faculty

These links contain access to tutorials on navigation, communication, grading, and best practices for both Moodle and Zoom.
Calendar
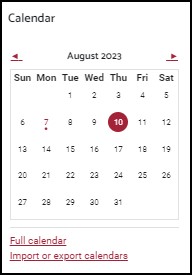
By clicking the month title (e.g. August 2023) at the top of the block, you will be taken to a more detailed view of the calendar by month. Here you will see all graded activities for students. If you do not see important reminders for students, follow the steps below:
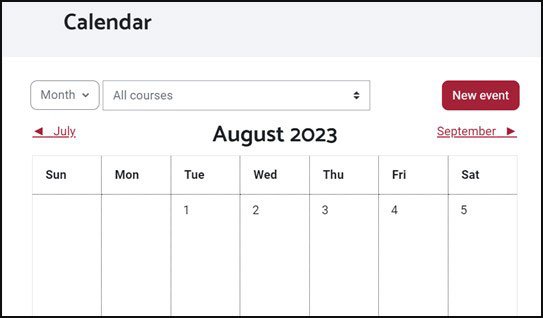
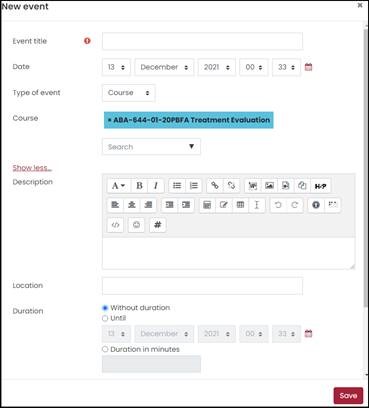
How Do I Create a New Calendar Event?
- Click New event at the top-right corner of the calendar.
- Give the event a title. You may also include a description, if you wish.
- Set the date and time of the event.
- OPTIONAL: The 'Duration' settings allow you to set an appropriate time limit for the event, whether a specific date, or a certain amount of time.
- OPTIONAL: The 'Repeat this event' box allows you to repeat the event weekly to create a set number of events.
- Once finished, make sure to save changes.
My Tools

Roster: A link to the course roster
Gradebook: A link to the course gradebook
Standard Course View
Profile and Settings (Top-Menu)
This menu system remains the same as seen in your Moodle Homepage. If you’d like to learn about these features, please see the .
Course Settings and Time (Secondary Menu)
This menu system is largely for students. If you would like to access your Gradebook or Reports, please see the side-panels.
Course Index
The Course Index is a feature on the left-side of your screen that allows easy access to the content pages of your online course. Click the button to expand or the button to close the Course Index.
The Course Menu
The Course Menu offers the user a way to navigate through specific categories of content. Clicking any of the headings returns the user to the first page of a category.
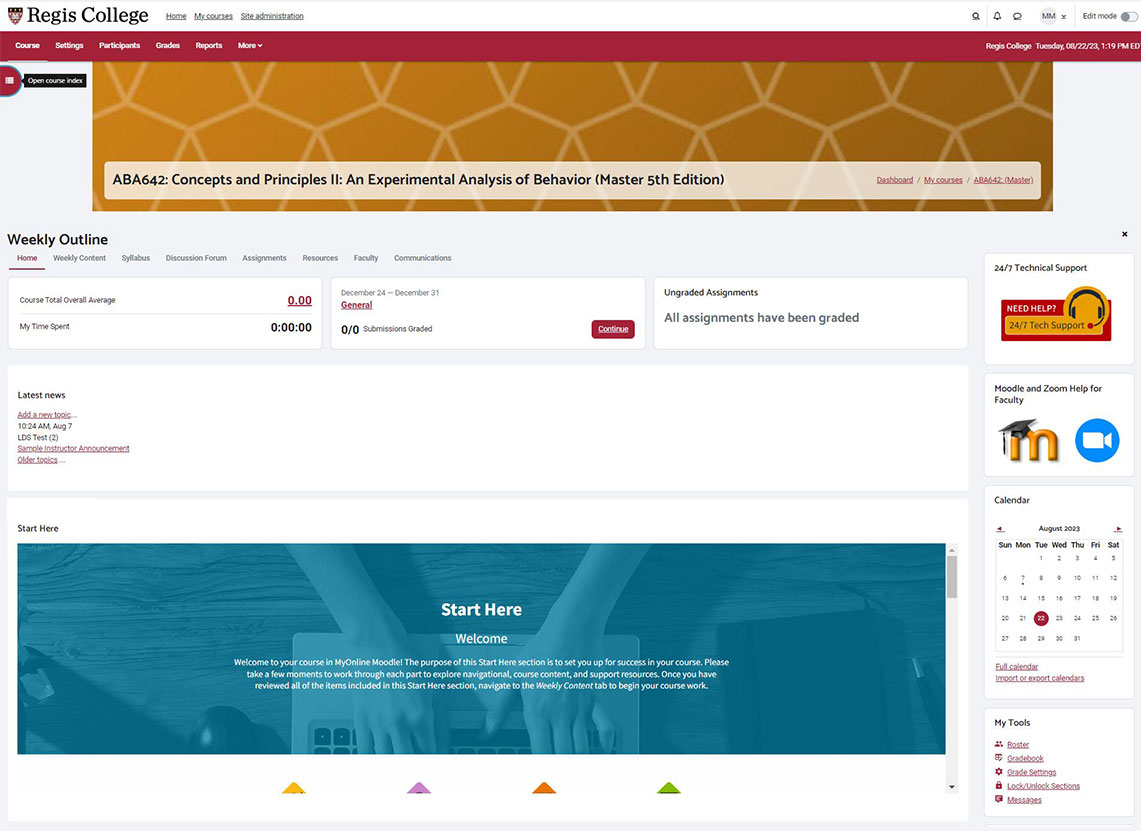
The Home Tab

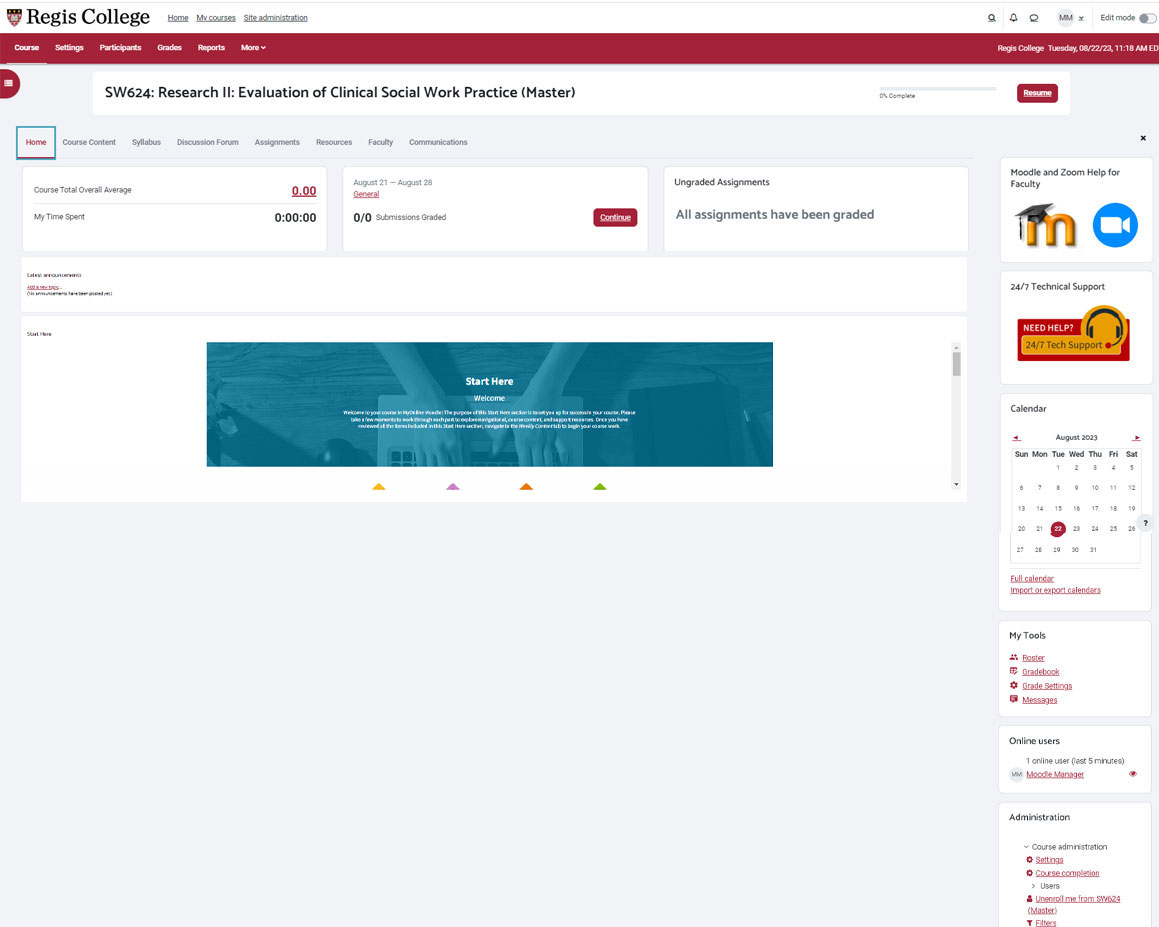
The Home tab contains the Course Reminders block, the General section of the course, the Latest news (Announcements), and the training section called Start Here.
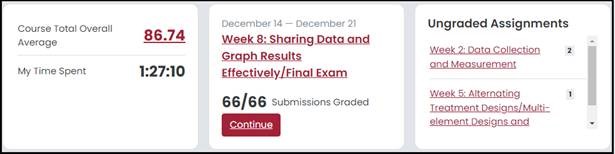
Course Reminders
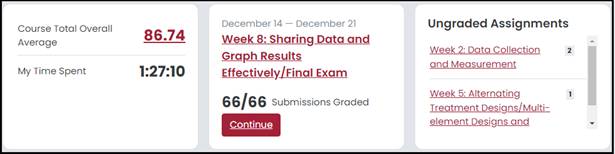
This area contains important statistical and process-related information for both instructors and students.
The Weekly Content Tab

The Weekly Content button will show all elements of your course in a vertical layout. Listed below are sections and pages that will be common across all courses:
What is in the Weekly Content Tab?
The General Section
The General section includes pages and items that students (and instructors) will need to review and access during the course. Some pages will have a “Hidden from students” label and will appear grey. This does not mean that instructors cannot access and interact with these pages.
Listed below are some of the more common elements found in General:
- Course Progress Checklist: This page identifies the pages that students have clicked and/or completed the qualifications for that activity to be labeled “complete.”
- Learning Activities Table: A page filled with a chart complete with all activities, due dates, and points for the entire course.
- Link to Faculty Orientations and Resource Center: This is a comprehensive resource area for all instructors. It contains all the information needed to teach and to get help. A great site to bookmark!
- Course Edit Log: This page is designed to allow instructors to make note of an error found in your live course. If you notice a spelling mistake, content error, broken link, or just want to make a suggestion for a change, this digital form will help make further iterations of this course even better for students.
- If you see an error that directly affects students’ performance, complete the Course Edit Log but also contact your Lead Faculty so the issue can be dealt with immediately. If you are a Lead Faculty member, please contact Tech Support, fill out a ticket, and follow up with the Lead Instructional Designer to have the issue fixed.
- Brainfuse: Certified Brainfuse tutors provide live, on-demand tutoring and assignment help in a variety of subjects, customized for your institution, when students need it most. Through intentional collaboration, Brainfuse tutors meet students where they are at in order to effectively help students of all skill levels. Brainfuse writing lab tutors use proven methods to assist users throughout the writing process, from inception to final draft. Brainfuse tutors work with students to revise critically, develop sensitivity to one’s audience, and ultimately become better writers.
Brainfuse offers an extensive collection of self-guided tools, including:
- SkillSurfer, a comprehensive library of lessons and practice tests in a variety of core subjects.
- Diagnostic tests for targeted academic support
- Flashbulb, a versatile flashcard tool with a library of content and creative features to refresh study habits.
- Foreign language lab with on-demand tutoring support and a robust vocabulary builder for students
The Weekly Content Sections
- Every module will contain an introduction with a video made by the course developer and weekly course objectives.
- A list will be provided of all due dates for formative and summative work.
- A chart of all learning materials will also be provided. This chart will include readings (both in the student’s possession and those found in their digital library or other online source), videos (links or embedded), and any other third-party resource needed to complete the week’s activities.
The Syllabus Tab

The Syllabus button contains a digital and printable version of the course syllabus. This document is an important for students to read and it’s imperative that you reiterate important elements of the syllabus early and throughout the course to remind students of policies and procedures.
Listed below are some of the areas of the syllabus that you may want to repeat in your course via Instructor Announcements:
- Days of the week: Day 1 typically being Monday and Day 7 being Sunday
- Due Times: Most assignments are due at 11:55 P.M. EST
- Citations and referencing requirements
- Frequency of email correspondence
- How to use Technical Support and Student Services Support
- A reminder of the grading policy, including the course late assignment policy
- Academic Integrity, attendance, code of conduct, and any other policy that might affect student behavior or performance
- Academic support and advising for graduate students
- Library access
- Any course-specific material that could affect learning
The Discussion Forum Tab

The discussion forums listed in this area are whole class and small group activities. These are the discussions that you will moderate, monitor, and contribute to in order to ensure student success.
- Week: Name of the week of your course
- Forum: A direct link to the discussion and its name
- Description: Note the value and due dates of your discussions. Discussions typically require students to post their initial post by Day 4 (Thursday) and complete responses to classmates by Day 7 (Sunday). This is done purposely to give everyone a chance to read and respond within a reasonable timeframe. Some discussions may have different requirements.
- Discussions: The number of threads in the discussion. This does not list the number of replies or posts.
- Unread Posts: The number of discussion posts that you have not seen as of yet.
- Track: Indicates if the instructor or student is using the tracking feature that allows notification of a new post.
- Subscribed: Indicates if the user has subscribed to the discussion meaning all new posts will alert the user via Moodle and email. Subscribing to all or specific forums is a decision you need to make. If you subscribe to all, it means every message posted by a student will not only post online but is also sent to you in an email alert. For a typical class that has two discussions a week and 20 students, this means on average three discussion posts a student. This will mean you’ll be receiving at least 120 emails a week of discussion posts!! We highly advise you not to subscribe to weekly discussions.
- Email Digest Type: Indicates if the user has subscribed to a digest style email of replies. This amalgamates all replies into one or many emails through the week.
The Assignments Tab

- This area allows instructors to filter only the activities of a particular week/module.
- This area allows instructors to filter only a specific type of activity to grade.
- This area allows instructors to filter only a particular status of an assignment:
- All
- Overdue
- Upcoming
- Completed
- A direct link to the activity.
- A due date of a particular activity.
- An overdue activity where an instructor has yet to complete grading.
- The number of graded and ungraded assignments.
The Resources Tab

The Faculty Tab

The Communications Tab

Course Announcements
This forum is a direct link to your whole class on Moodle. Whatever you post here also goes to each student’s institutional email. Consider the effect a very active instructor might have in this special forum and aim for a minimum of 1-3 posts per week to engage students. Also consider that students can only read these messages and are not able to post their own replies. By default, all students are automatically subscribed.
Faculty Contact Information and Office Hours
This forum is another area of Moodle where instructors can place their contact information as well as when they are available for office hours/1-on-1 sessions.
Questions for Faculty
This forum is very important for you to subscribe to. This forum is for students to ask you questions and for you to respond thoughtfully within 24hrs. Assuming that the questions here are important enough to be brought up by one student, there is a chance that all students in the class could be having the same issues. Respond to the student in this forum but make sure you reiterate the issue and response in your Course Announcements.
Live Session Information
This forum is particularly important for instructors to use for:
- Posting the URL and times for students to join scheduled Live Sessions.
- Instructors should use this forum and the Course Announcements forum to post summaries to Live Sessions and any additional resources that might be relevant to those that missed the session.
24/7 Technical Support
A direct link to your dedicated 24/7 technical support. All students and instructors can access this service at any time.
Moodle and Zoom Help for Faculty
These links contain access to tutorials on navigation, communication, grading, and best practices for both Moodle and Zoom.
Calendar
By clicking the month title (e.g. August 2023) at the top of the block, you will be taken to a more detailed view of the calendar by month. Here you will see all graded activities for students. If you do not see important reminders for students, follow the steps below:
How Do I Create a New Calendar Event?
- Click New event at the top-right corner of the calendar.
- Give the event a title. You may also include a description, if you wish.
- Set the date and time of the event.
- OPTIONAL: The 'Duration' settings allow you to set an appropriate time limit for the event, whether a specific date, or a certain amount of time.
- OPTIONAL: The 'Repeat this event' box allows you to repeat the event weekly to create a set number of events.
- Once finished, make sure to save changes.
My Tools
Roster: A link to the course roster
Gradebook: A link to the course gradebook
Discussions
Main Discussion Navigation Screen
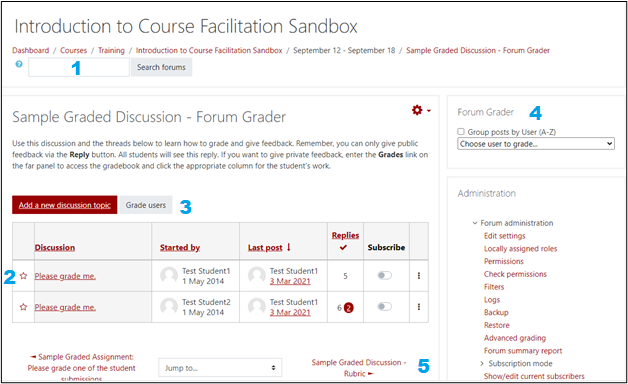
After the user clicks the discussion icon on the main course page, the main page discussion page appears. Here you’ll see the titles of individual discussion threads along with other relevant user information.
- The Search forums area allows a user to search for specific keywords and phrases that may appear somewhere within the course’s discussions. A positive match will allow a user to move directly to the post that contains the keyword.
- The discussion thread box contains the following key features:
- A star that once clicked will promote a discussion thread to the top of the list of threads.
- The name of the discussion thread.
- The name of the individual who posted the first thread (usually the course developer).
- The name of the individual who made the last post.
- The number of read and unread replies.
- The Subscribe button: This forces Moodle to send all discussion replies to your institutional email. The replies can be turned on or off via your Course Notifications in your Profile settings.
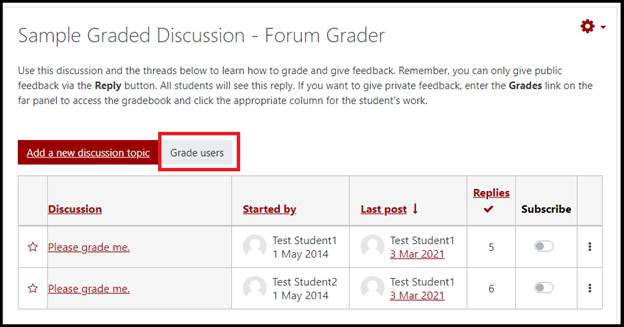
- The Grade users button. This feature takes the grader to a screen where all posts made by individual posters can be seen on one screen and graded. More about this tool can be found in the Grading Discussions document. This feature also contains the ability to integrate a rubric and marking sheet.
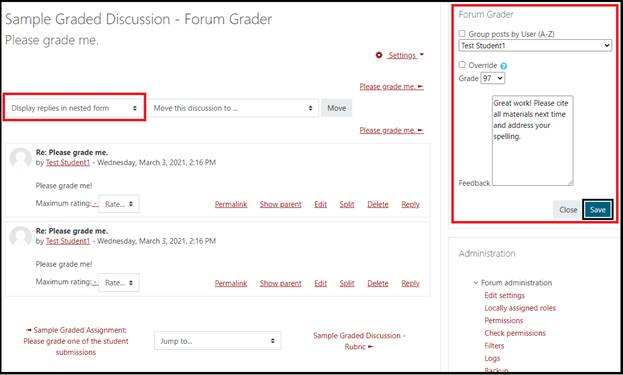
- The Forum Grader tool. This feature takes the grader to a screen where all posts made by individual posters can be seen on one screen and graded. More about this tool can be found in the Grading Discussions document. This feature does not allow for a rubric integration but the feedback does go straight to the Gradebook.
- The menu system at the bottom of the main discussion page allows for users to navigate back or forward pages within the Moodle course.
Discussion Thread Navigation
This screen will show the user all discussion forum posts. From here, the user can:
How Do I View All Posts? (Nested)
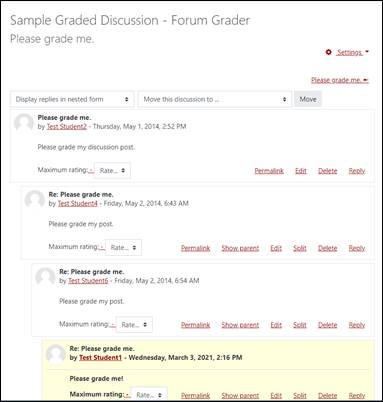
The most common way to view a discussion thread is to view replies in nested form. This allows the reader to see every post with its full text while alerting the reader to who began the first thread and who replies to each subsequent post. Keep an eye on yellow text: this is the color used to indicate a new post. If you would like to use this feature, adjust your Forum Notification settings in your Profile.
How Do I View Only the Titles of Messages? (Threaded)

This style of viewing discussion posts allows the reader to more clearly see who began a discussion and the people who replied. The reader must then click the individual threads to review.
How Do I View Posts by Newest or Oldest?

This style of discussion view only affects the initial replies and can be useful to see when students replied compared to others.
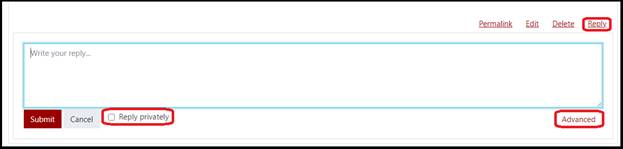
How Do I Reply Publicly to a Post?
Any use of the Reply button in a discussion posts a user’s message to the entire online class. If the user wants to format text, insert links, images, or media, they can click the Advanced button. This will allow the use of the standard text editor, and file attachments.
How Do I Reply Privately to a Post?
Any discussion reply can be made private by clicking the Reply Privately checkbox or by clicking Advanced and choosing Reply privately at the bottom. Replying privately should be limited to matters concerning active discussions and not for grading as there’s a separate private feedback area specifically used for grading.
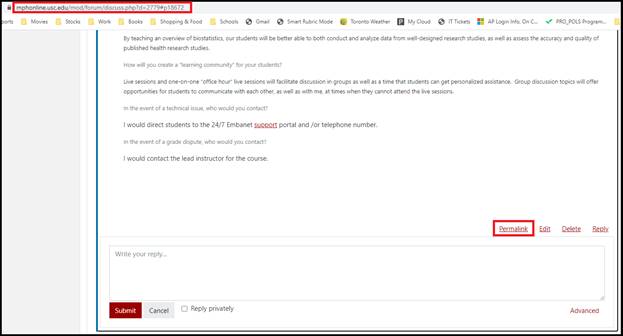
How Do I Link to a Post with a URL?
Sometimes a user posts something of value that either a student or instructor wants to share in another part of the course, share in another discussion, or simply quote another user’s response. Click the Permalink button and go to the URL area of your browser and copy the highlighted link. This link can be inserted anywhere and accessed as long as the user has access to where the link originated.
Grading Moodle Discussions
Filtering Discussion Posts via the Forum Grader Tool
This tool allows users to organize posts of a specific user to make it easier to read and review. Use the pull-down menu to select a student and every post that they made to the forum will appear.
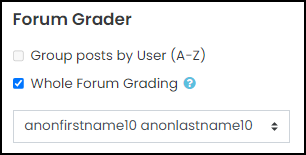
- The Forum Grader sorting system only works in the nested view.
- This tool helps to organize discussions if students posted more than once in different parts of a discussion.
- The grade and feedback are sent directly to the Moodle Gradebook.
- The corner of the Feedback box can be extended to allow for easier text entry.
- The override button is available to ensure only one area of Moodle has the most recent grade. If a grade has already been entered into the Moodle
Gradebook or other place, the user must click “override” to cancel a previous grade and enter a new one.
Steps:
- Use the pull-down menu above the discussion to select Display replies in nested form.
- Go to the far-right and select the student you wish to grade from the Forum Grader area.
- Review the student’s performance. Enter a grade and feedback. If you wish to expand the Feedback area, click the bottom-right corner with your mouse and drag.
- Click Override if you wish to cancel out a grade in another area of the course.
- Click Save when complete. All grades and feedback are sent to the Moodle Gradebook.
Grading Individual Users via the Grade-All Tool with Rubric (MHA, MPH, ABA, MSW)”
This tool allows a user to grade all discussion threads on one screen. This tool also incorporates a rubric to simplify grading.
Steps:
- Click Grade users from the main discussion screen. All discussion threads will be included.
- From the Grading screen, choose a user by using the left or right buttons or the magnifying glass. The magnifying glass icon allows the grader to see all discussion participants in alphabetical order. The left and right buttons only allow one user to be seen in sequential order.
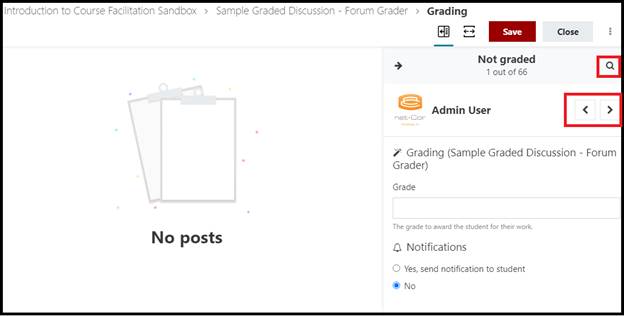
- After selecting a user to grade, the grader will use the rubric area to choose the criteria that best matches the student’s performance. The grader can also send a notification to the student alerting them to an impending grade to their Gradebook. The grader can also view the parent post or the entire discussion that a student’s post belongs to. The grade is sent directly to the student’s Gradebook.
Important Note: All criteria feedback is viewed within the discussion rubric and does not transfer to the student’s gradebook. Overall feedback can be entered via the student’s Gradebook column.
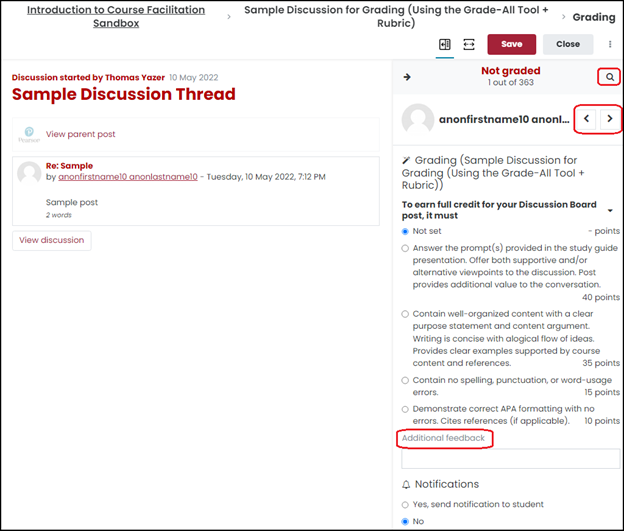
- If the grader wants to leave feedback for the user, they are encouraged to comment directly within the student’s Gradebook cell.
Grading Individual Users via the Smart Rubric (MSN)
At Regis there are discussions that require a few extra steps of evaluation. These discussions require the use of an interactive rubric tool called a Smart Rubric. Only discussions in the MSN program at Regis use the Smart Rubric mode for grading.
Please review the following resource before grading:
Smart Rubrics at Regis CollegeGrading Individual Users via the Gradebook
Assignments
At Regis there are assignments that require a few extra steps of evaluation. These assignments require the use of an interactive rubric tool called a Smart Rubric. All assignments at Regis use the Smart Rubric mode for grading.
Please review the following resource before continuing:
Smart Rubrics at Regis CollegeHow Do I View a Graded Assignment?
To begin grading, you can access student submissions from the View all submissions page.
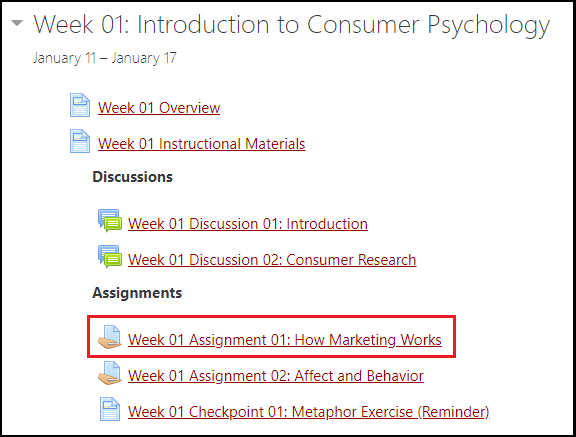
- On your course page, click the name of an Assignment activity. The Assignment page opens and displays the description of the assignment and a summary of submissions.
- Below the summary, click View all submissions. The View all submissions page will open.
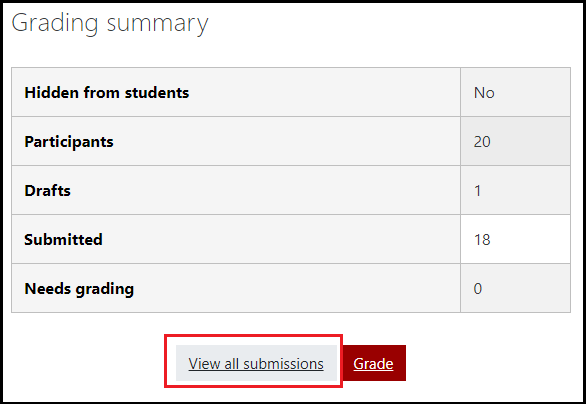
The View/grade all submissions page displays a table showing student names, when submissions were last modified, and links to the submissions.

To view and grade individual submissions, click Grade under the Grade column heading. The Grading page will open showing the full text of online text submissions and links to download submitted files. Let’s examine the Grading page layout next:
Assignment Navigation
Top Menu

- Links to the homepage of the course, the assignment, and to the list of all submissions.
- Links to the student profile and contact information page.
- Allows the user to change the student and to filter the type of assignment: Submitted, Not submitted, Requires grading, and Granted extension.
Annotation Menu
Use the annotation menu to mark-up a student’s submission. The student will be able to view these annotations once grades have been made and released. The edits do not harm the document and can be deleted at any time simply by clicking the markup and selecting the garbage can icon.
Note: If an instructor does not want to use this feature and prefers to download the student paper and use Track Changes, markup, feedback, or comments via MS Word, they can simply scroll to the right and download the document to their computer.

| Document Navigation |  |
|---|---|
| Search Comments |  |
| Expand / Collapse Comments |  |
| Rotate 90 Degrees Left / Right |  |
| Make Comment / Comment Color |  |
| Drag or Select Document |  |
| Organic Line |  |
| Straight Line |  |
| Boxed Comment |  |
| Circled Comment |  |
| Highlighter |  |
| Change Color |  |
| Stamp / Stamp Type |  |
Top-Right Menu
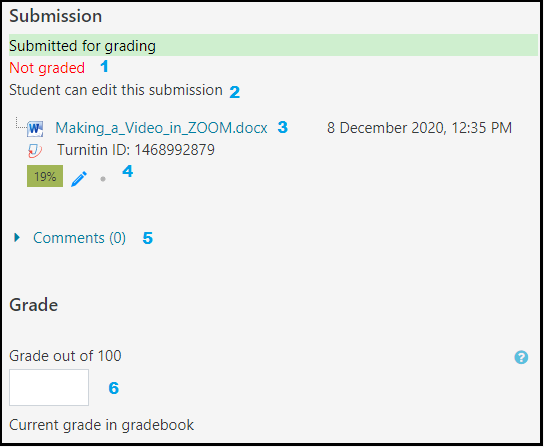
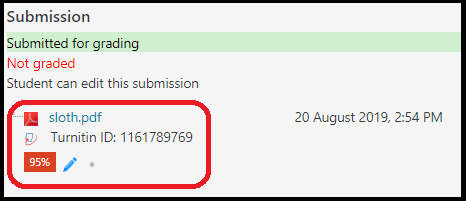
- Green color indicating a submission that was on-time. Red color would indicate late. This area also indicates if the assignment has been graded.
- Some assignments allow students to re-submit as long as the due date has not passed.
- All documents can be manually downloaded to the instructor’s computer for offline grading. Either click the title or right-click and manually download.
- Turnitin is a plagiarism detection tool used by many institutions. Here the unique document code is revealed as well as the Similarity Index: a percentage that reveals how much of a document has been found from other sources all over the internet. By clicking the pencil icon, the instructor can review the document in more detail and decide further actions.
- The Comments area gives students a chance to communicate to the instructor details about their submission.
- This is the grading area. Instructors will enter grades here and the grade will automatically be transferred to the Moodle Gradebook. Keep in mind that a grade can only exist in one spot at a time, meaning the Gradebook can not have a different grade than the Assignment area seen here.
Feedback Comments and Feedback Files
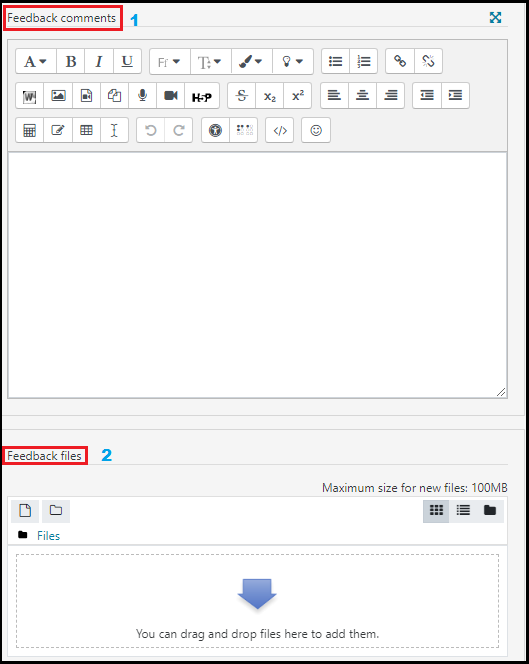
- This area is where instructors can give direct feedback to the student. These feedback comments can be formatted text, images, URLs (links), audio recordings, video recordings, and more.
Besides the traditional formatting tools, here are some of the more useful options available for commenting:

Make URL / Break URL Take internet links and add them to your comments. Don’t forget to choose the “Open in new window” option so that students will see the links open in a new browser tab 
Import Word file Allows the user to link to a MS Word document 
Insert image Allows the user to insert an image into the comments window 
Insert media file Allows the user to insert a video URL or attach a video or audio file from their own computer 
Record audio / Record video Allows the user to record a 2:00 minute microphone or webcam recording that attaches to the Feedback area - If you downloaded the student’s submission and added your own TrackChanges, markup, feedback, or Comments directly to the paper, this is the area you can return the file back to the student. This is also an excellent area for instructors to attach other files such as rubrics, and more.
Feedback Comments
Feedback Files
Bottom Menu

- Check this box to make sure students get an email message notifying them that their assignment has been returned.
- Always click Save at the bottom of your screen to ensure students’ grades and feedback are posted to the Gradebook.
- Moodle offers three views to allow for more screen space when grading.
What is Turnitin?
Reviewing papers via the Turnitin plugin allows the instructor to use Turnitin’s proprietary plagiarism detection tool without having to leave the standard assignment grading tool. Turnitin uses a vast worldwide database to compare submitted documents to all documents that are collected from other institutions and online sources and is a great way to evaluate how a student is maintaining both originality and proper citation.
Instructors will be able to access the Turnitin plagiarism detection tool from the assignment menu or from within a Moodle assignment. Once in the submission area, an instructor can click the Similarity Index value and enter the Turnitin Feedback Studio tool.
Note: this tool is not used to grade; it is only used as a subjective tool to alert instructors to potential plagiarism. You must use your own discretion to decide how to proceed based on institutional policy.

The Turnitin Similarity Index is the percentage of a student’s paper that has been identified from other papers around the world. If you click on this icon, the Feedback Studio tool will open and you may review every source that the student has properly or improperly cited in their paper.
The Similarity Report
Do I Grade within Turnitin?
You can grade Turnitin assignments from within Turnitin but only the grade will transfer to the Moodle Gradebook. All comments will remain in Turnitin. If you choose this method, remind students via Announcements to review their Turnitin documents for feedback.
Instructors are encouraged to grade the assignment and give overall feedback in the traditional grading areas of the Moodle assignment and the Gradebook.
Turnitin at Regis is only used to evaluate plagiarism and potential issues surrounding citation. The tool is not used to grade and no annotation is done via the Turnitin plugin tool. Instructors are encouraged to grade the assignment and give overall feedback in the traditional grading areas of the Moodle assignment and the Gradebook.
What Does the Similarity Index Score Mean?
The numerical value indicates the percentage of the paper that has been found in other submitted works around the world. While small percentages could still be egregious, anything over 30% usually demands a closer inspection by the instructor. A high degree of similarity to other sources indicates the student is using material that may not be their own BUT the Turnitin program detects both properly cited and non-cited work. This means the instructor needs to review the document carefully for originality.
Interpreting the Similarity ReportQuizzes
How Do I Grade an Individual Attempt?
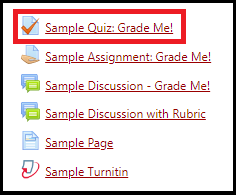
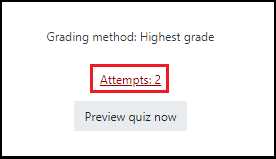
- On your course page, locate the quiz and click the quiz name to open the quiz. The quiz summary page will open. If any students have attempted the quiz, you will see a link titled "Attempts: #" where # is the number of attempts made so far.
- On the Quiz summary page, click Attempts: #. The Attempts summary page will open.
- To review responses made by a particular student, click Review attempt under that student's name in the table.

- An instructor can go through each question answered by the student. Most questions will be automatically graded but each can have the grade changed and feedback added by clicking Make comment or override mark:

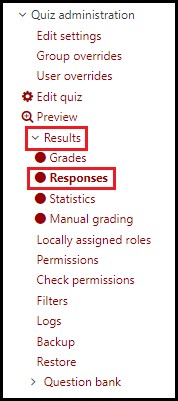
How Do I View Quiz Answers?
- Go to the far-right side and click Results. Four options will appear: choose Responses.
Each student in the course will have their answers shown on the main screen:

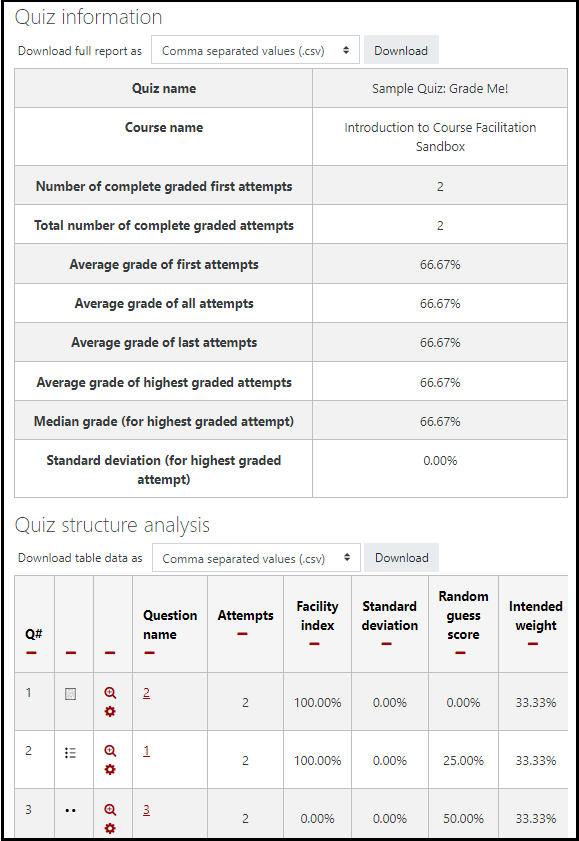
How Do I View Quiz Statistics?
- Go to the far-right side and click Results. Four options will appear: choose Statistics.
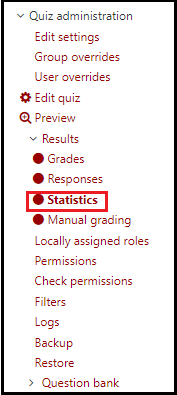
A full set of data will be revealed:
How Do I Grade Essay Questions? (Or Multiple Students for the Same Question)
Moodle scores all question types that support automatic grading. For question types that require manual grading (such as a short answer question), an instructor can look at each question with all students posting their answers on one page to make it much easier to compare.
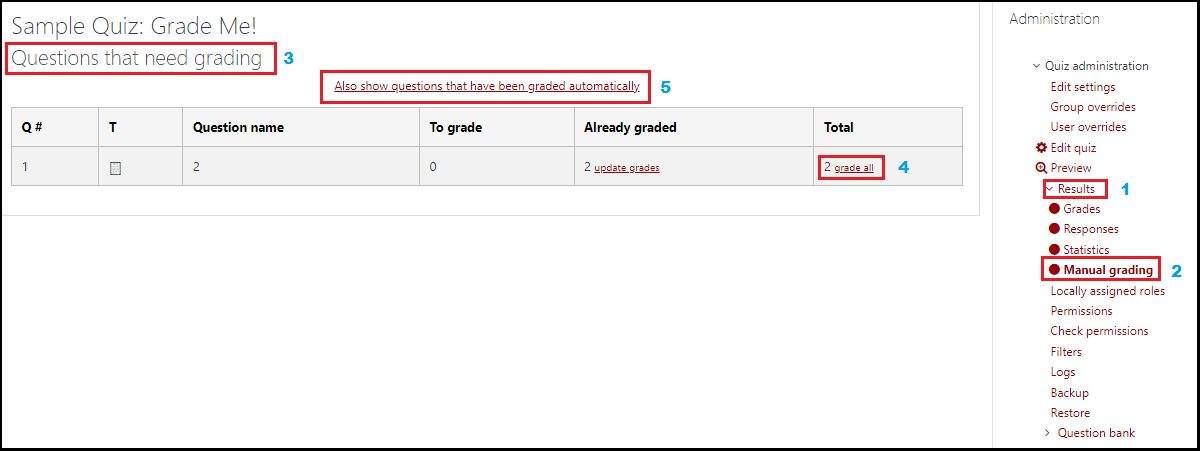
- Click Results (1) on the right-hand menu and the Manual grading (2) option.
- The Questions that need grading (3) screen appears. The instructor can click grade all (4) on the right-hand side to review all student answers for a specific question.
- Alternatively, the instructor can click Also show questions that have been graded automatically (5) to list all questions in the same format as above. This is especially useful for comparing answers.
How Do I Give Special Quiz Permissions?
There are a variety of situations where you might want to override quiz access settings for specific students or for groups of students. For example, you might want to re-open a quiz for just one student who missed the quiz with a legitimate excuse. Or, you might want a quiz to be available only to a particular group of students. Moodle provides ways for you to implement both user-level overrides and group-level overrides to configure special access permissions for specific students.
Note: This applies only to situations where you want to do a single exemption for a specific student and will not affect attempts that have already been made. In some situations, such as when a student has an accommodation, you can use the Quiz user with unlimited time role for that student so that they get an extension in all your quiz activities.
To configure special access for individual students:
- On your course page, click the link to the quiz you want to configure. The Quiz summary page will open.
- On the Quiz summary page, select the Actions menu (
 ), a drop-down list will open. From this list select User overrides. The Override summary page will open.
 - Click Add user override. The Edit override page will open.
- Enter the student's name in the Search box, and then select the student's name from the list of search results.
- Modify the settings you want to override. The parameters you can adjust are:
- Require password: Specify a unique password for just this particular student.
- Open the quiz, Close the quiz: Specify separate open and close dates that apply only for this particular student.
- Time limit: Adjust the duration that this student has for taking the quiz, or you can disable this entirely if you want to give the student an unlimited amount of time to finish the quiz.
- Attempts allowed: Specify how many attempts this particular student is allowed.
- Revert to quiz defaults: Revert the settings back to what they are for all students.
- Click Save when you are finished, or to repeat this for more students, click Save and enter another override.
Note: If a student is being given another attempt after they have already taken the quiz, you will need to add an extra attempt here for the student to be allowed to take the quiz again.
How Do I Regrade a Quiz?
You might have to regrade the quiz, after students have attempted it:
- If you found that one of the questions on the quiz is incorrect and made the necessary changes.
- If you have to edited either the Maximum mark or Maximum grade settings.
To regrade the quiz in Moodle:
- On your course page, locate the Quiz and select Quiz name to open the quiz. The Quiz summary page will open. If any students have attempted the quiz, you will see a link titled "Attempts: #" where # is the number of attempts made so far.
- On the Quiz summary page, select Attempts: #. The Attempts summary page will open.
- On the Attempts summary page, you can either select Regrade all or Dry run a full grade.
Note: The Dry run a full grade will display which points would change if a real regrade was performed, without actually updating the grades. To update all the grades, select Regrade all or Regrade attempts marked as needing regrading (located above the Attempts summary table) or click Regrade selected attempts (located below the Attempts summary table) to regrade selected attempts.
How Do I Reset a Quiz Attempt?
Occasionally you might want to reset a particular student's quiz attempt (in case you want to allow them to re-attempt the quiz), or you might want to reset all attempts.
- On your course page, locate the Quiz and select Quiz name to open the quiz.
- Click Attempts: #. The Attempts summary page will open.
- Click Attempts: #. The Attempts summary page will open.
- Select the check boxes next to the particular student(s) whose attempts you want to delete.
- Click Delete selected attempts.
- Inform the student or students that the quiz is ready to be taken again.
Moodle Gradebook
Gradebook Basics
The Moodle Gradebook automatically aggregates scores and feedback from Assignments, Activities, and/or Manual grades from your Moodle course. Students can view their own grades in individualized reports which protect student privacy. Instructors can decide when and how students see the gradebook, or choose to hide the gradebook entirely.
Graders can use the gradebook to manually enter and edit grades (Overridden), or export the gradebook to manage it in another software (like MS Excel).
Moodle maintains a history of changes made to the gradebook to allow instructors to audit who made changes and when. The gradebook also maintains a running course total for students based on a grading scheme set by the instructor.
Important: Always enter a value for a student in the Gradebook. An empty cell causes Moodle to omit the item from a student’s score.
Why Do I Grade in the Moodle Gradebook?
The scores for graded Moodle activities are automatically aggregated into the gradebook. In order for Moodle to easily aggregate scores automatically, entries in the gradebook are numeric by default. The default score for each activity is 100, though this can be updated in the Assignment settings for each activity. In the gradebook, weights of individual activities, or categories of activities, are aggregated to create a final score for the class.
This style of grading is best used to:
- Override activity grades and give additional feedback.
- Enter grades and feedback for journals, blogs, wikis, or participation grades.
This style of grading is NOT best for:
- Viewing student discussions while concurrently grading them. If you wish to do so, you’ll need two monitors (one with the discussion itself and the other with the Moodle Gradebook).
- Returning assignments back to students. There is no ability to download or return a student submission via the Gradebook. You must return to the actual activity to do this.
How Do I Access the Grader Report?
- The Gradebook is not accessible from the main Moodle Homepage.
- The Gradebook link can be found on the far-right under My Tools on the right of your Moodle Course Homepage.

The Grader Report with Editing Turned On
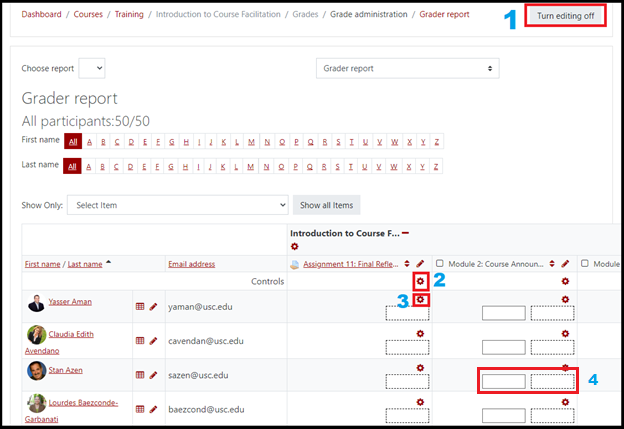
- With Turn editing on clicked, the Gradebook is now ready for you to edit. Every column listed in the Gradebook behaves in the same way. They each have the same tools and functions regardless of the activity type.
- The Edit grade item screen: The gear icon at the top of the activity column edits functions that affect the ENTIRE activity and not just one student. Since the grading schemes and settings for every assignment have been set up by your Boundless Learning instructional designer, it is recommended that you do not make any changes in this column EXCEPT to adjust the Hidden function:
- The Edit grade screen: The gear icon in the cell of a particular student gives the grader access to a special area to give a grade, override a grade, hide a grade, and give detailed feedback.
**This area does not allow the grader to return a document to the student. That must be done via the activity grading area, or via email.
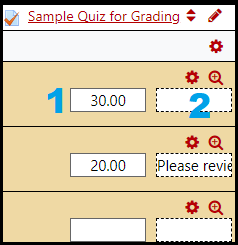
- Quick Grading. Quick Grading is the process where graders don’t leave the Grader Report and prefer to enter grades and feedback directly onto the screen. To do this, simply click in the first cell (1) to enter a grade, or the second cell (2) to enter feedback.
The Grader Report with Editing Turned Off
- The main grading screen in the Gradebook is called the Grader Report. When you enter this screen, you’ll see all of your students listed along with columns and cells of their graded activities.
- Most instructors grade as much as they can within the graded activity, i.e., the discussion, the assignment, the quiz; they leave revisions and grading of special components (Participation grades, special projects, etc.) to the Gradebook.
- The Grader Report page contains some very important elements to help you grade efficiently:
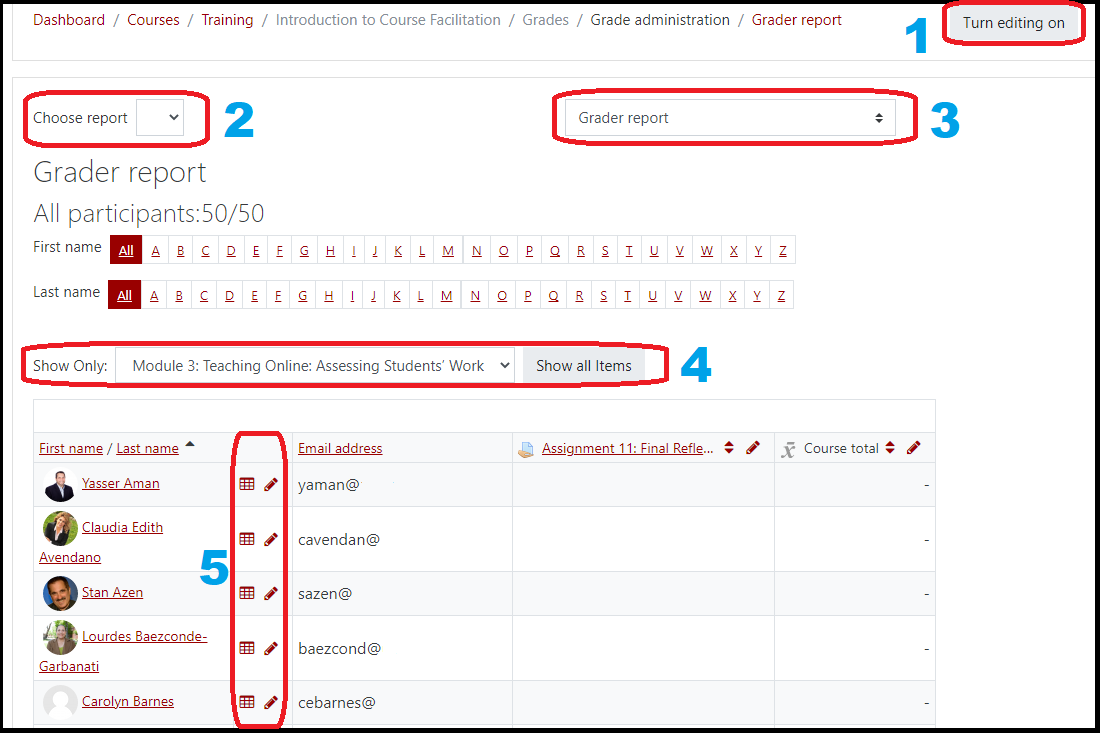
- Turn editing on: You must click Turn editing on in the top-right corner to make any changes in the Gradebook. Without doing so, the Gradebook can only be viewed.
- Choose report: A pull-down menu that contains all of your other courses that you are teaching. If you select another course from this pull-down menu, you will be taken directly to that course’s Grader Report. This is a very handy tool for instructors teaching multiple sections.
- Grade administration menu: A pull-down menu that takes the user to other grading areas and screens to help evaluate students. Typically, most instructors do not leave the Grader Report screen.
- Show Only: A pull-down menu that allows the instructor to view all weeks/modules or only a particular week or module of content. This is essential to avoiding the difficult task of scrolling back and forth using the scrollbars at the bottom of the screen. For many courses, there could be over 30 gradebook entries; this tool allows you to see a single module/week at a time.
- Student Profile & Single View: Instructors can click the chart to review one student’s total performance and feedback. The Single View allows for easy editing of just one student’s grades. However, both of these options do not contain the full editing capabilities of the Grader Report.
Inside the Edit Grade Screen
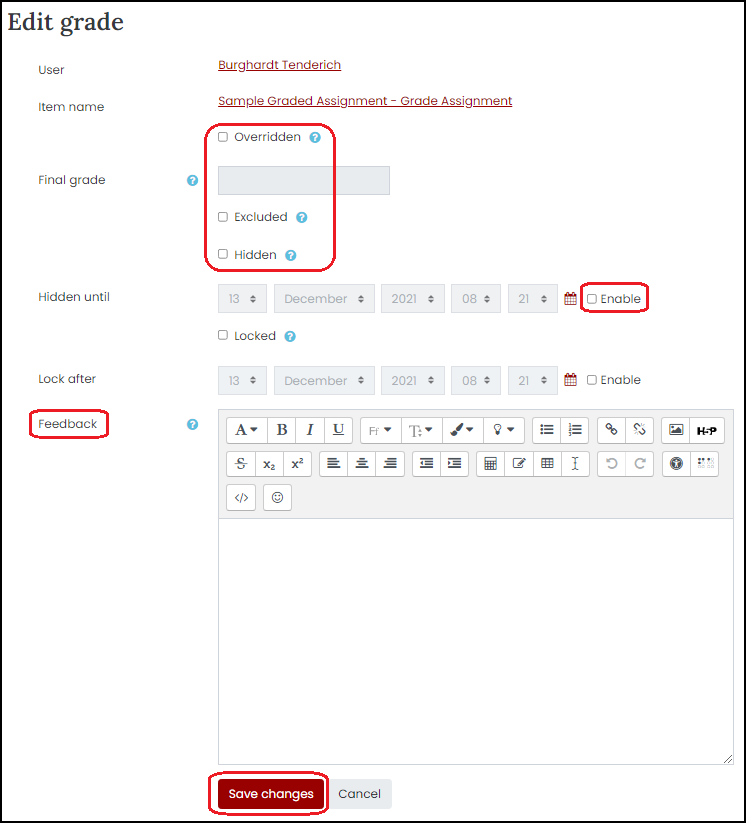
The Overridden box allows the grader to override any grading entered in another area of Moodle. This is important because if a grader overrides a grade in the Gradebook, all rubric or feedback information that was entered in the activity area is now overwritten by whatever is in the Grader Report.
When do you override a grade?
- Adjusting a student grade
- Entering a discussion grade for the first time
- A grader chooses to use the Gradebook as their primary form of grading
The Excluded function will remove a particular item from a student’s final grade.
The Hidden function is very important. This allows graders to hide grades or feedback from all students or individual students. This is especially useful if graders are unable to grade activities within a short time span and would prefer if all students received their grades and feedback at the same time. Don’t forget to return to this screen when you want to release all grades and feedback.
The Feedback area of the Edit grade page is a fully functional text editor much like the one seen in Instructor Announcements, discussions, and assignments.
Hint: The Feedback area does not allow for any attachments or recorded audio or video (unless linked by a static URL).
Hint: Always make sure you click Save at the bottom of this screen.
How Do I Use the Single View to Grade?
The Single View in the Moodle Gradebook gives the grader an opportunity to quickly grade, give feedback, and bulk grade. While it does allow for quick grading, it has its limitations:
- There is no ability to return a document to a student.
- There is no text editor.
- There is no ability to hide a grade.
- Every time you use the Single View, it overrides the Gradebook.
Single User View allows you to segregate a single student’s grade. Clicking on the single view icon next to each student’s name in the Grader Report takes you to the single view page displaying all the grades for the particular student.
- To access Single View, click the pencil icon:
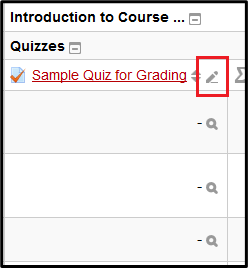
- The Single View screen allows you to enter grades and feedback but you must check the box under the Override All / None column. Once you do, the grades and feedback entered into this area override the Gradebook or any other activity grade.
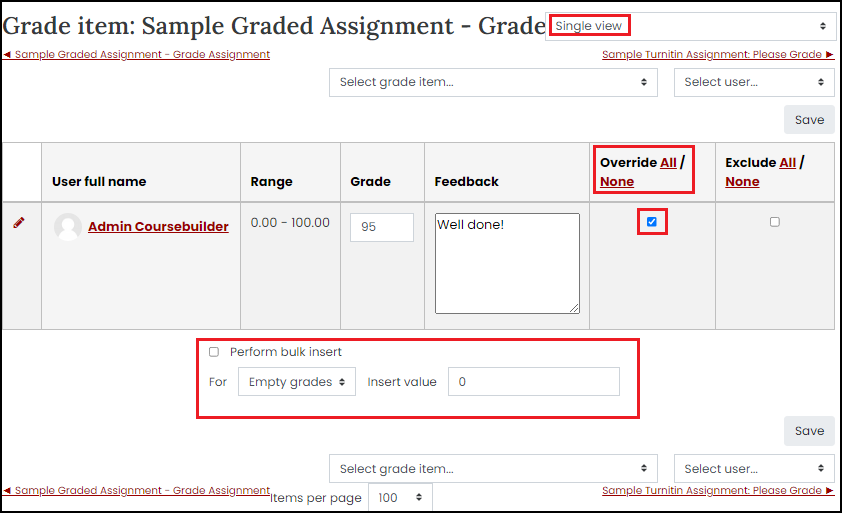
- At the bottom of the Single View is the Perform bulk insert area. If you’d like to give more than one student a particular grade, you can use this function.
How Do Import and Export Grades from the Gradebook?
How Do I Export Grades?
Moodle allows you to take data from your gradebook and export it to your own computer so you can modify values or input them into your own grading system (e.g., if you use advanced formulas to compute grades and prefer to work in a program like Excel). Moodle exports grades in the following file formats:
- Plain text file .CSV (default)
- Excel Spreadsheet .XLSX
- XML file
- OpenDocument spreadsheet
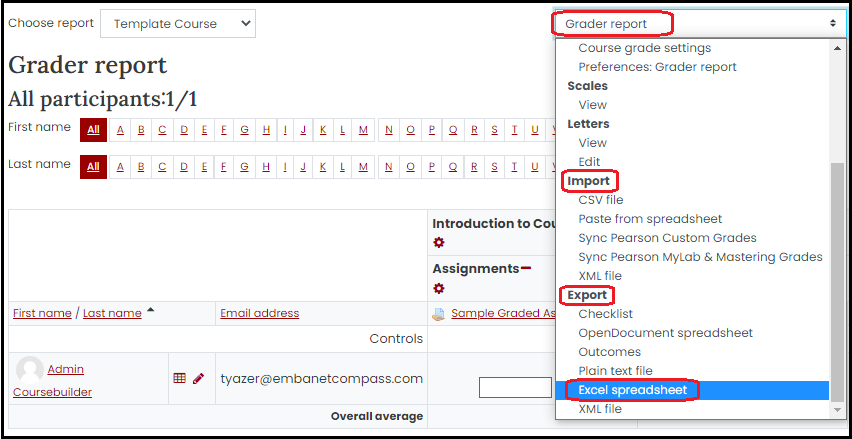
- Go to your Gradebook.
- In the navigation tab (at top-right), click Export and choose the format of your Gradebook file.
- Under Grade items to be included, select the check boxes for the columns to download.
Note: By default, every column in your gradebook will be included. At the top or bottom of the list, you can click Select all/none to make selecting columns more efficient.
- Under Export format options, select the check boxes for the settings you wish to change.
- Include feedback in export: Include a column in the exported file for existing feedback or to add feedback for future upload.
- Require active enrollment: Only include students in the export whose enrollment is active and has not been suspended.
- Export new or updated grades only: Exports only grades that have been changed since the most recent import.
Note: This option is only available for XML file export.
- Grade export display types: Select which grade format(s) you wish to include in the export. Each format will be in a new column.
- Separator: Select the delimiter for the text. Note: This option is only available for Plain text file export.
- Click Download to start downloading your file.
How Do I Import Grades?
If you have grades recorded in a spreadsheet, you can upload grades to the gradebook and specify where in the gradebook you want the grades to go. In order for Moodle to match data from your spreadsheet to students in your class, you need to have a unique identifier for students. If you plan to use this feature often, we suggest exporting a spreadsheet from the gradebook as a way of creating a template for your class.
How Do I Hide a Graded Activity from All Students?
There are times when you simply can’t complete grading for all students in one sitting. You also don’t want one student or a group of students to receive their grades and feedback before other students. It’s best to hide the entire graded item from their view while you work in the background.
- Enter the Gradebook.
- Click the gear icon at the top of a graded item’s column.
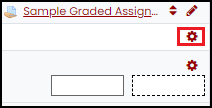
- Check the Hidden box and click Save changes at the bottom.
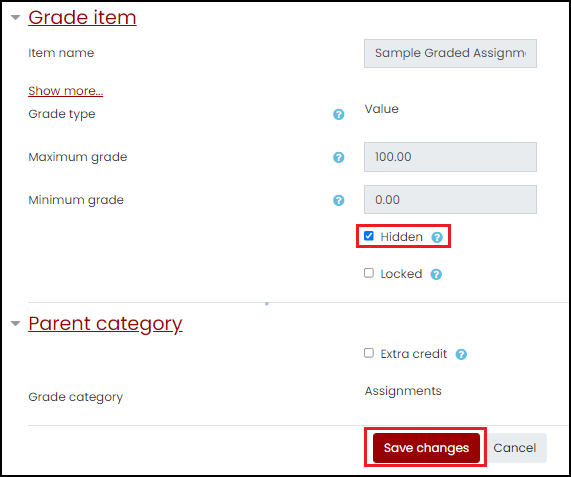
- Return to your Gradebook. Notice how the activity is now greyed-out. This means students can not see their grade or their feedback until you return to the options and uncheck the Hidden option.